

My passion for yarn bombing began in 2014 when I was asked by Bath in Fashion to create a display for their event. From this small beginning a great yarn bomb was born with thousands of crochet roses cascading down the colonnades of Bath city centre. This was made possible by the wonderful army of women that came together to work on the project and from the hundreds of roses that were sent to me from all the country.

Many of the roses were created from this pattern which was inspired by Attic 24 with the additional twist of an extra row to create a rose with 2 colours. It's simple and quick and once you've made one you will want to make a bouquet!
All terms are UK and I am using a 4mm hook with Rico Essentials Cotton for this tutorial as their colours are divine and the stitches show up beautifully.
CH = Chain. Yarn over pull it through stitch on hook
SS = Slip Stich. Hook into stitch, yarn over, pull it through everything.
DC = Double Crochet. Hook into stitch, yarn over, pull it through stitch (2 stitches on hook) yarn over, pull it through both stitches.
HTR = Half treble. Yarn over, hook into stitch, yarn over, pull it back through stitch (3 stitches on hook), yarn over, pull it through all three stitches.
TR = Treble. Yarn over, hook into stitch, yarn over, pull it back through stitch (3 stitches on hook), yarn over and pull it through 2 stitches, yarn over and pull it through both stitches.

Begin by working CH 26
Into the second chain stitch from your hook work 1 DC

Continue all the way along working 1 DC into each stitch = 24 stitches.
CH 3

Turn your work and into the stitch as indicated by the needle work 4 TR

Into the next stitch as indicated by the needle work 1 SS and pull it tight.
This completes your first large petal.
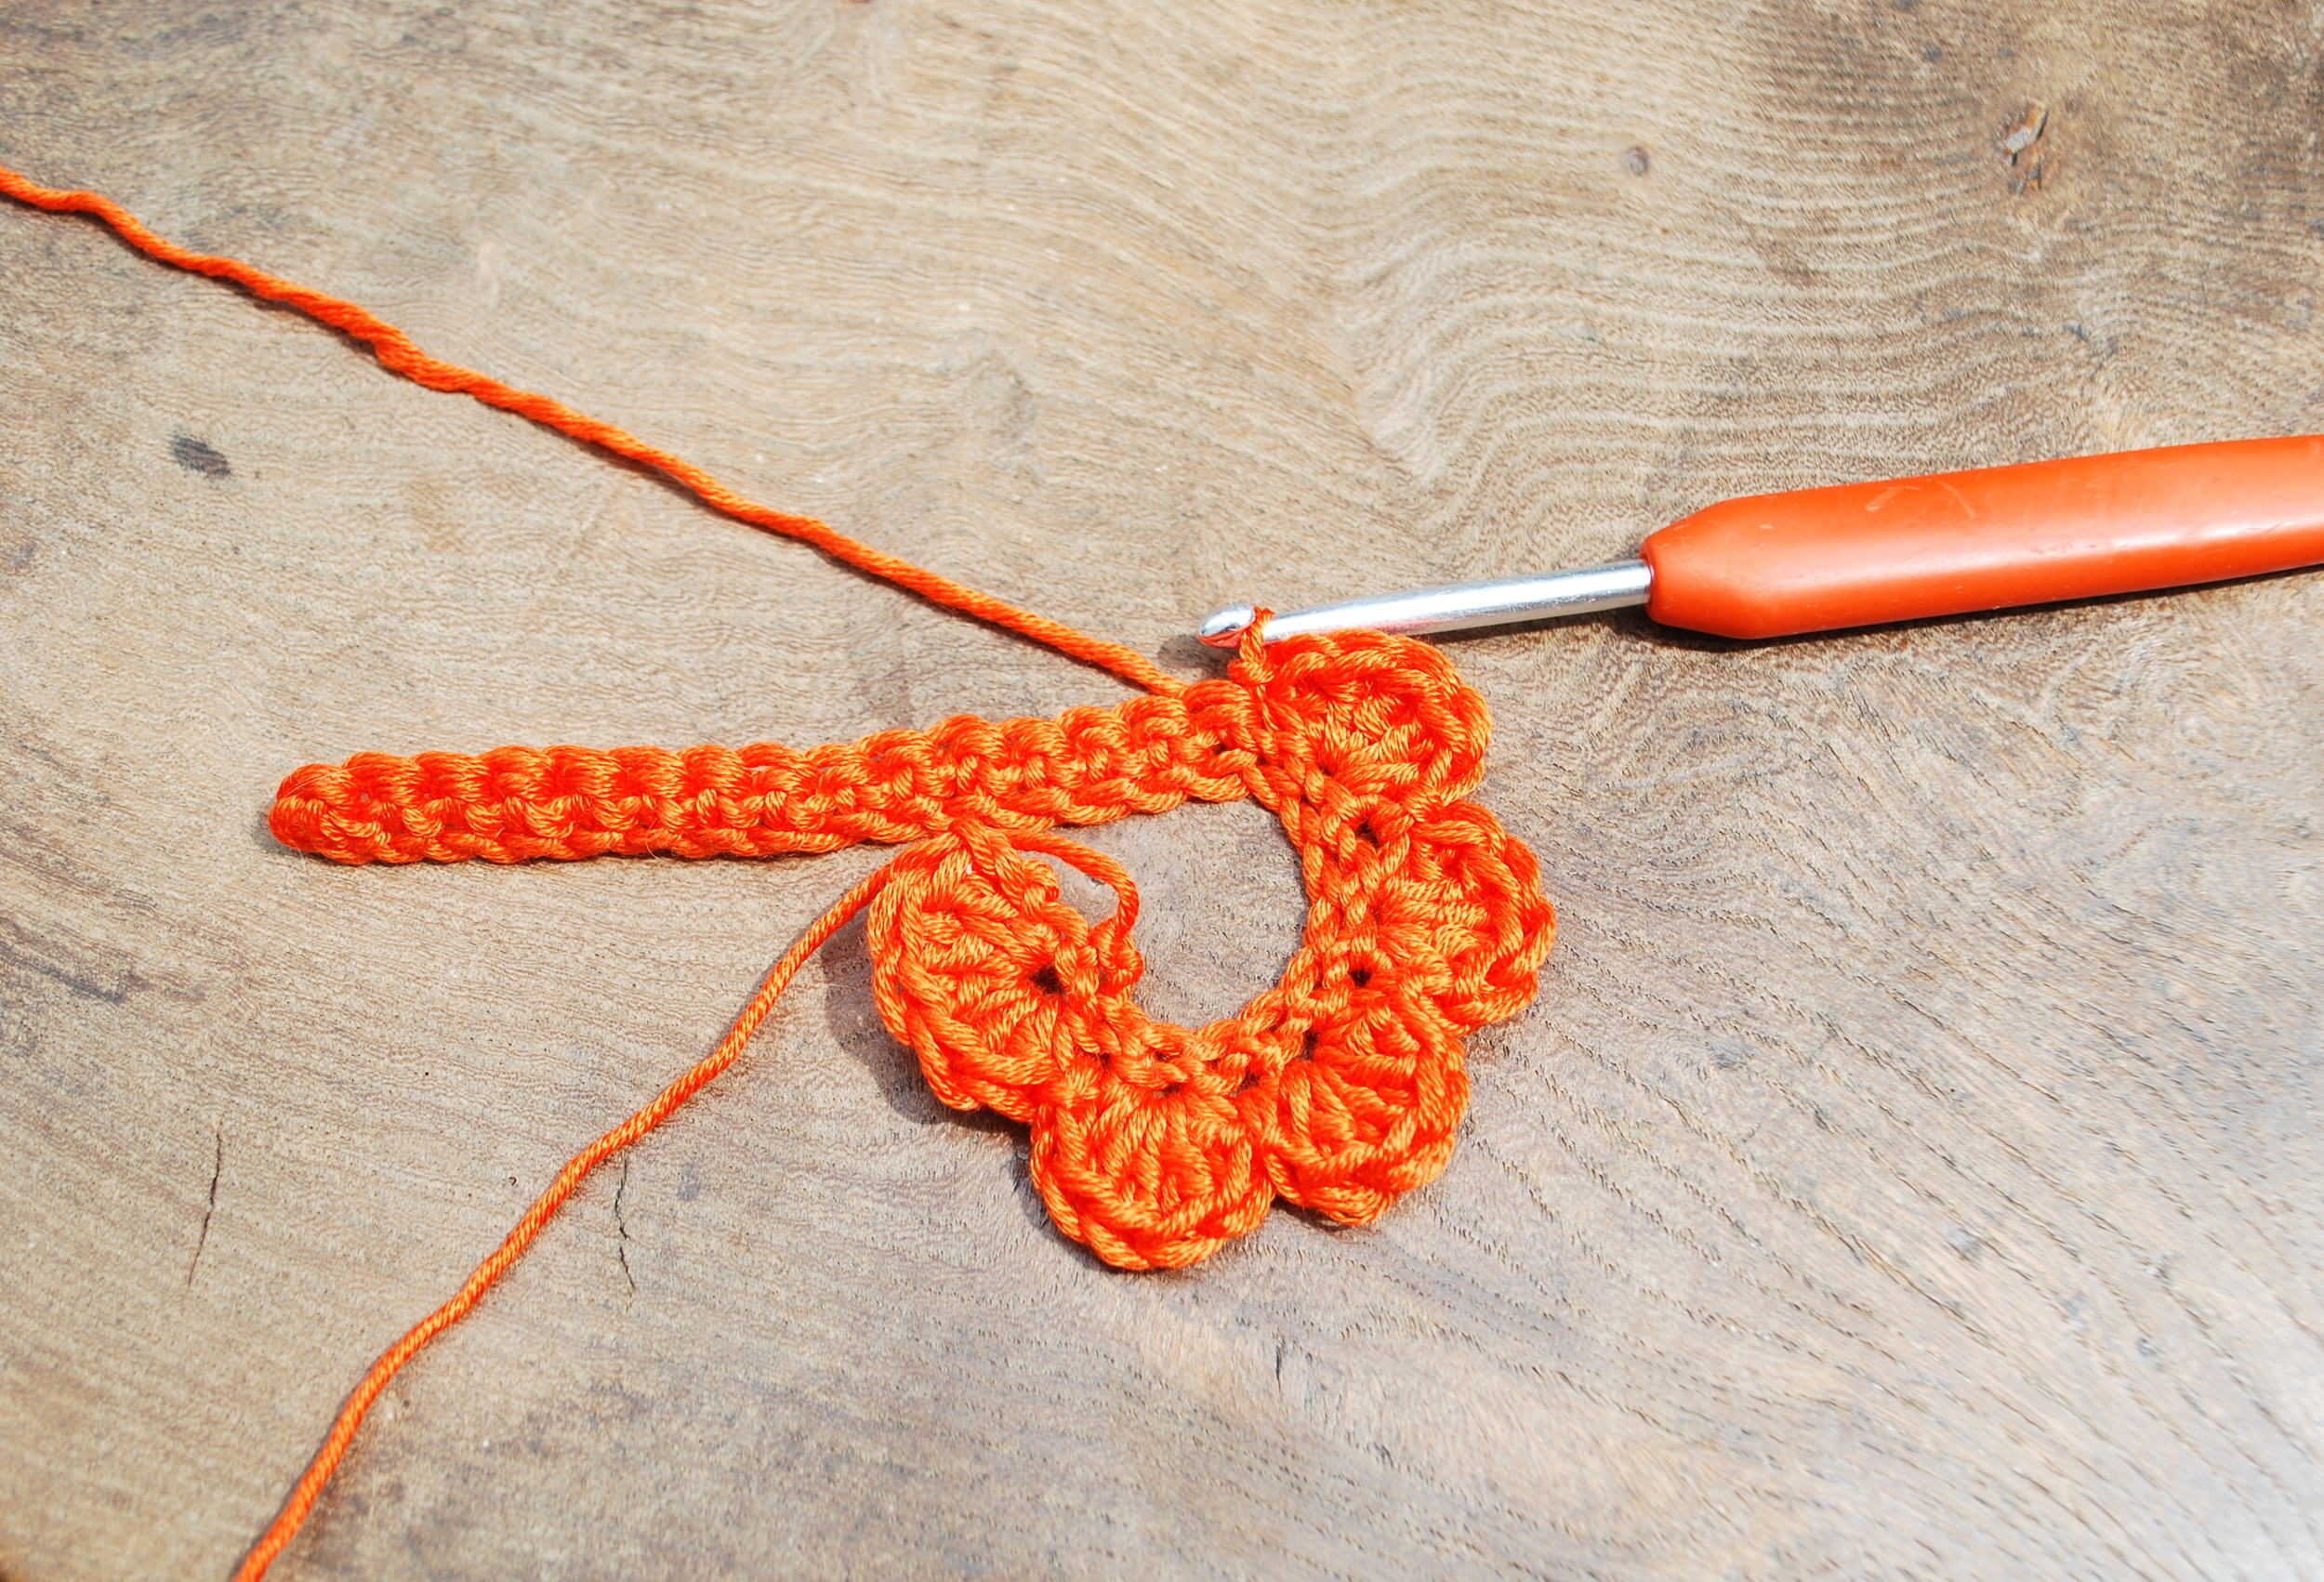
Into the next stitch work 5 TR, slip stitch into the next stitch. (you now have 2 large petals) Repeat this 3 more times to make 5 large petals. Notice how your work is beginning to curl. This is meant to happen!

Into your next stitch work 5 HTR followed by a SS into the next stitch. Repeat this 3 more times and you have made 4 medium petals.
Into the next stitch work 5 DC followed by a SS into the next stitch. Repeat 2 more times and you have made 3 small petals.

Cut your yarn and fasten off. Now join in your new colour with a CH 2
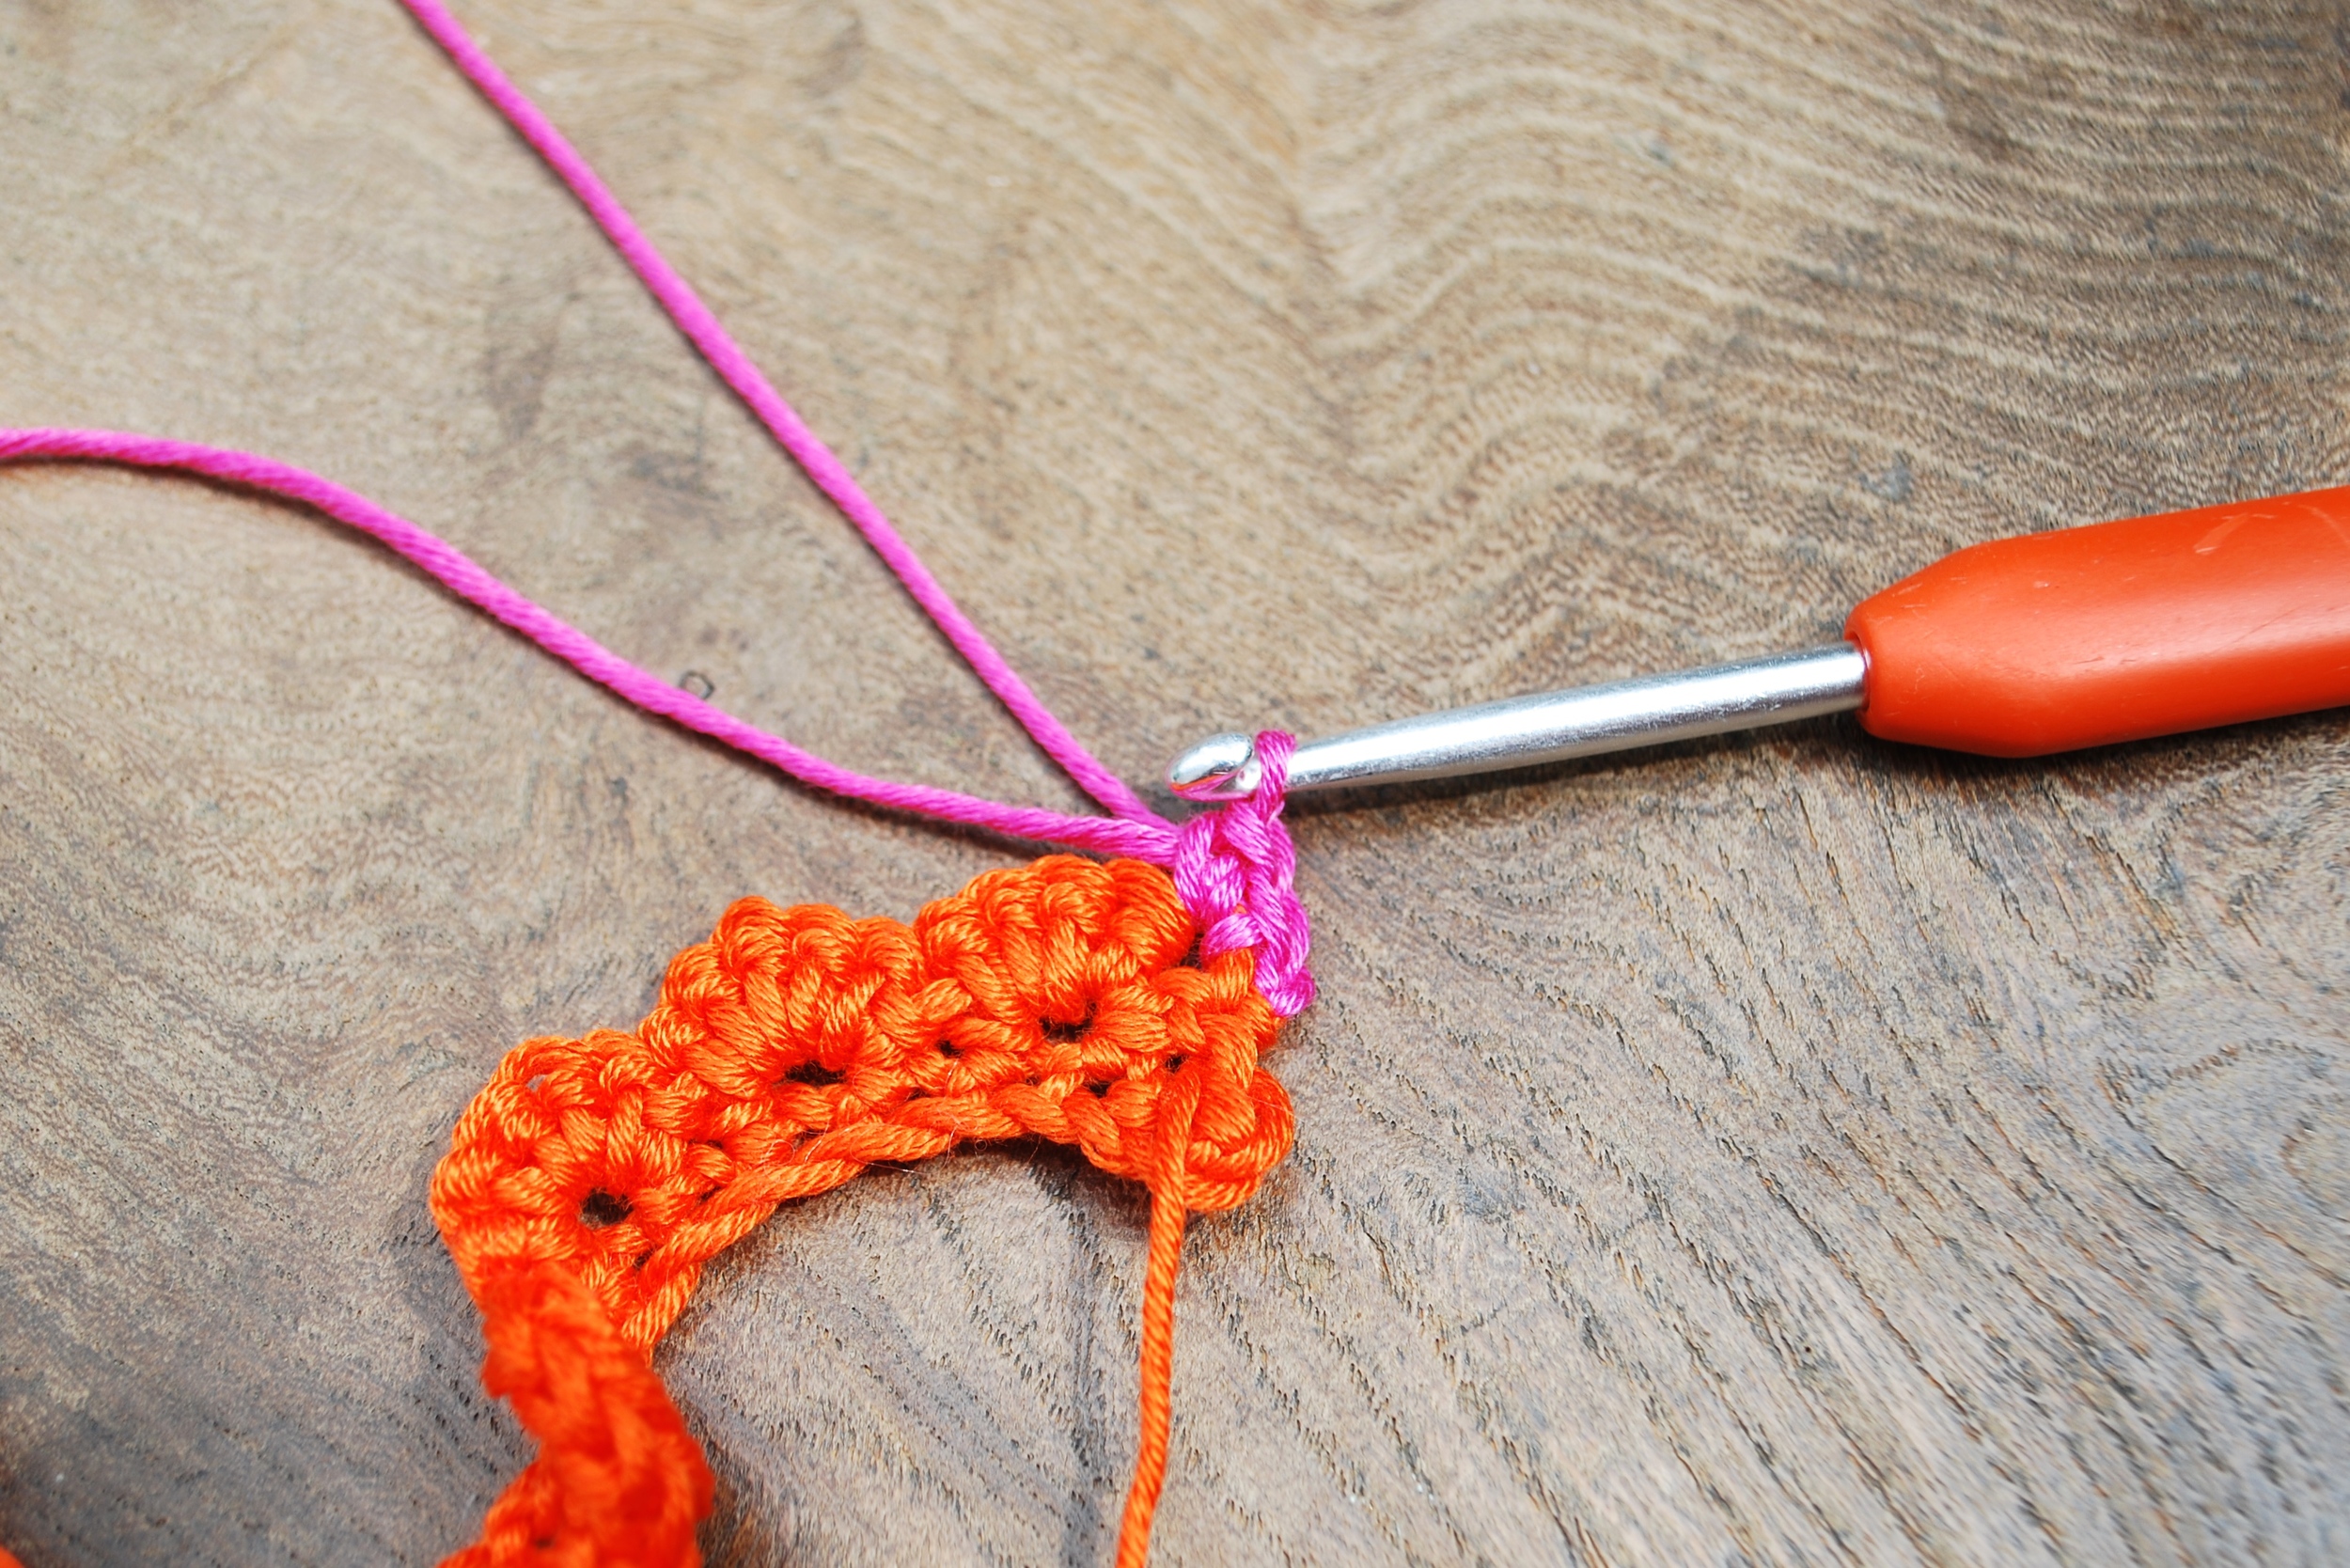
Turn your work and work 2 DC into the next stitch.
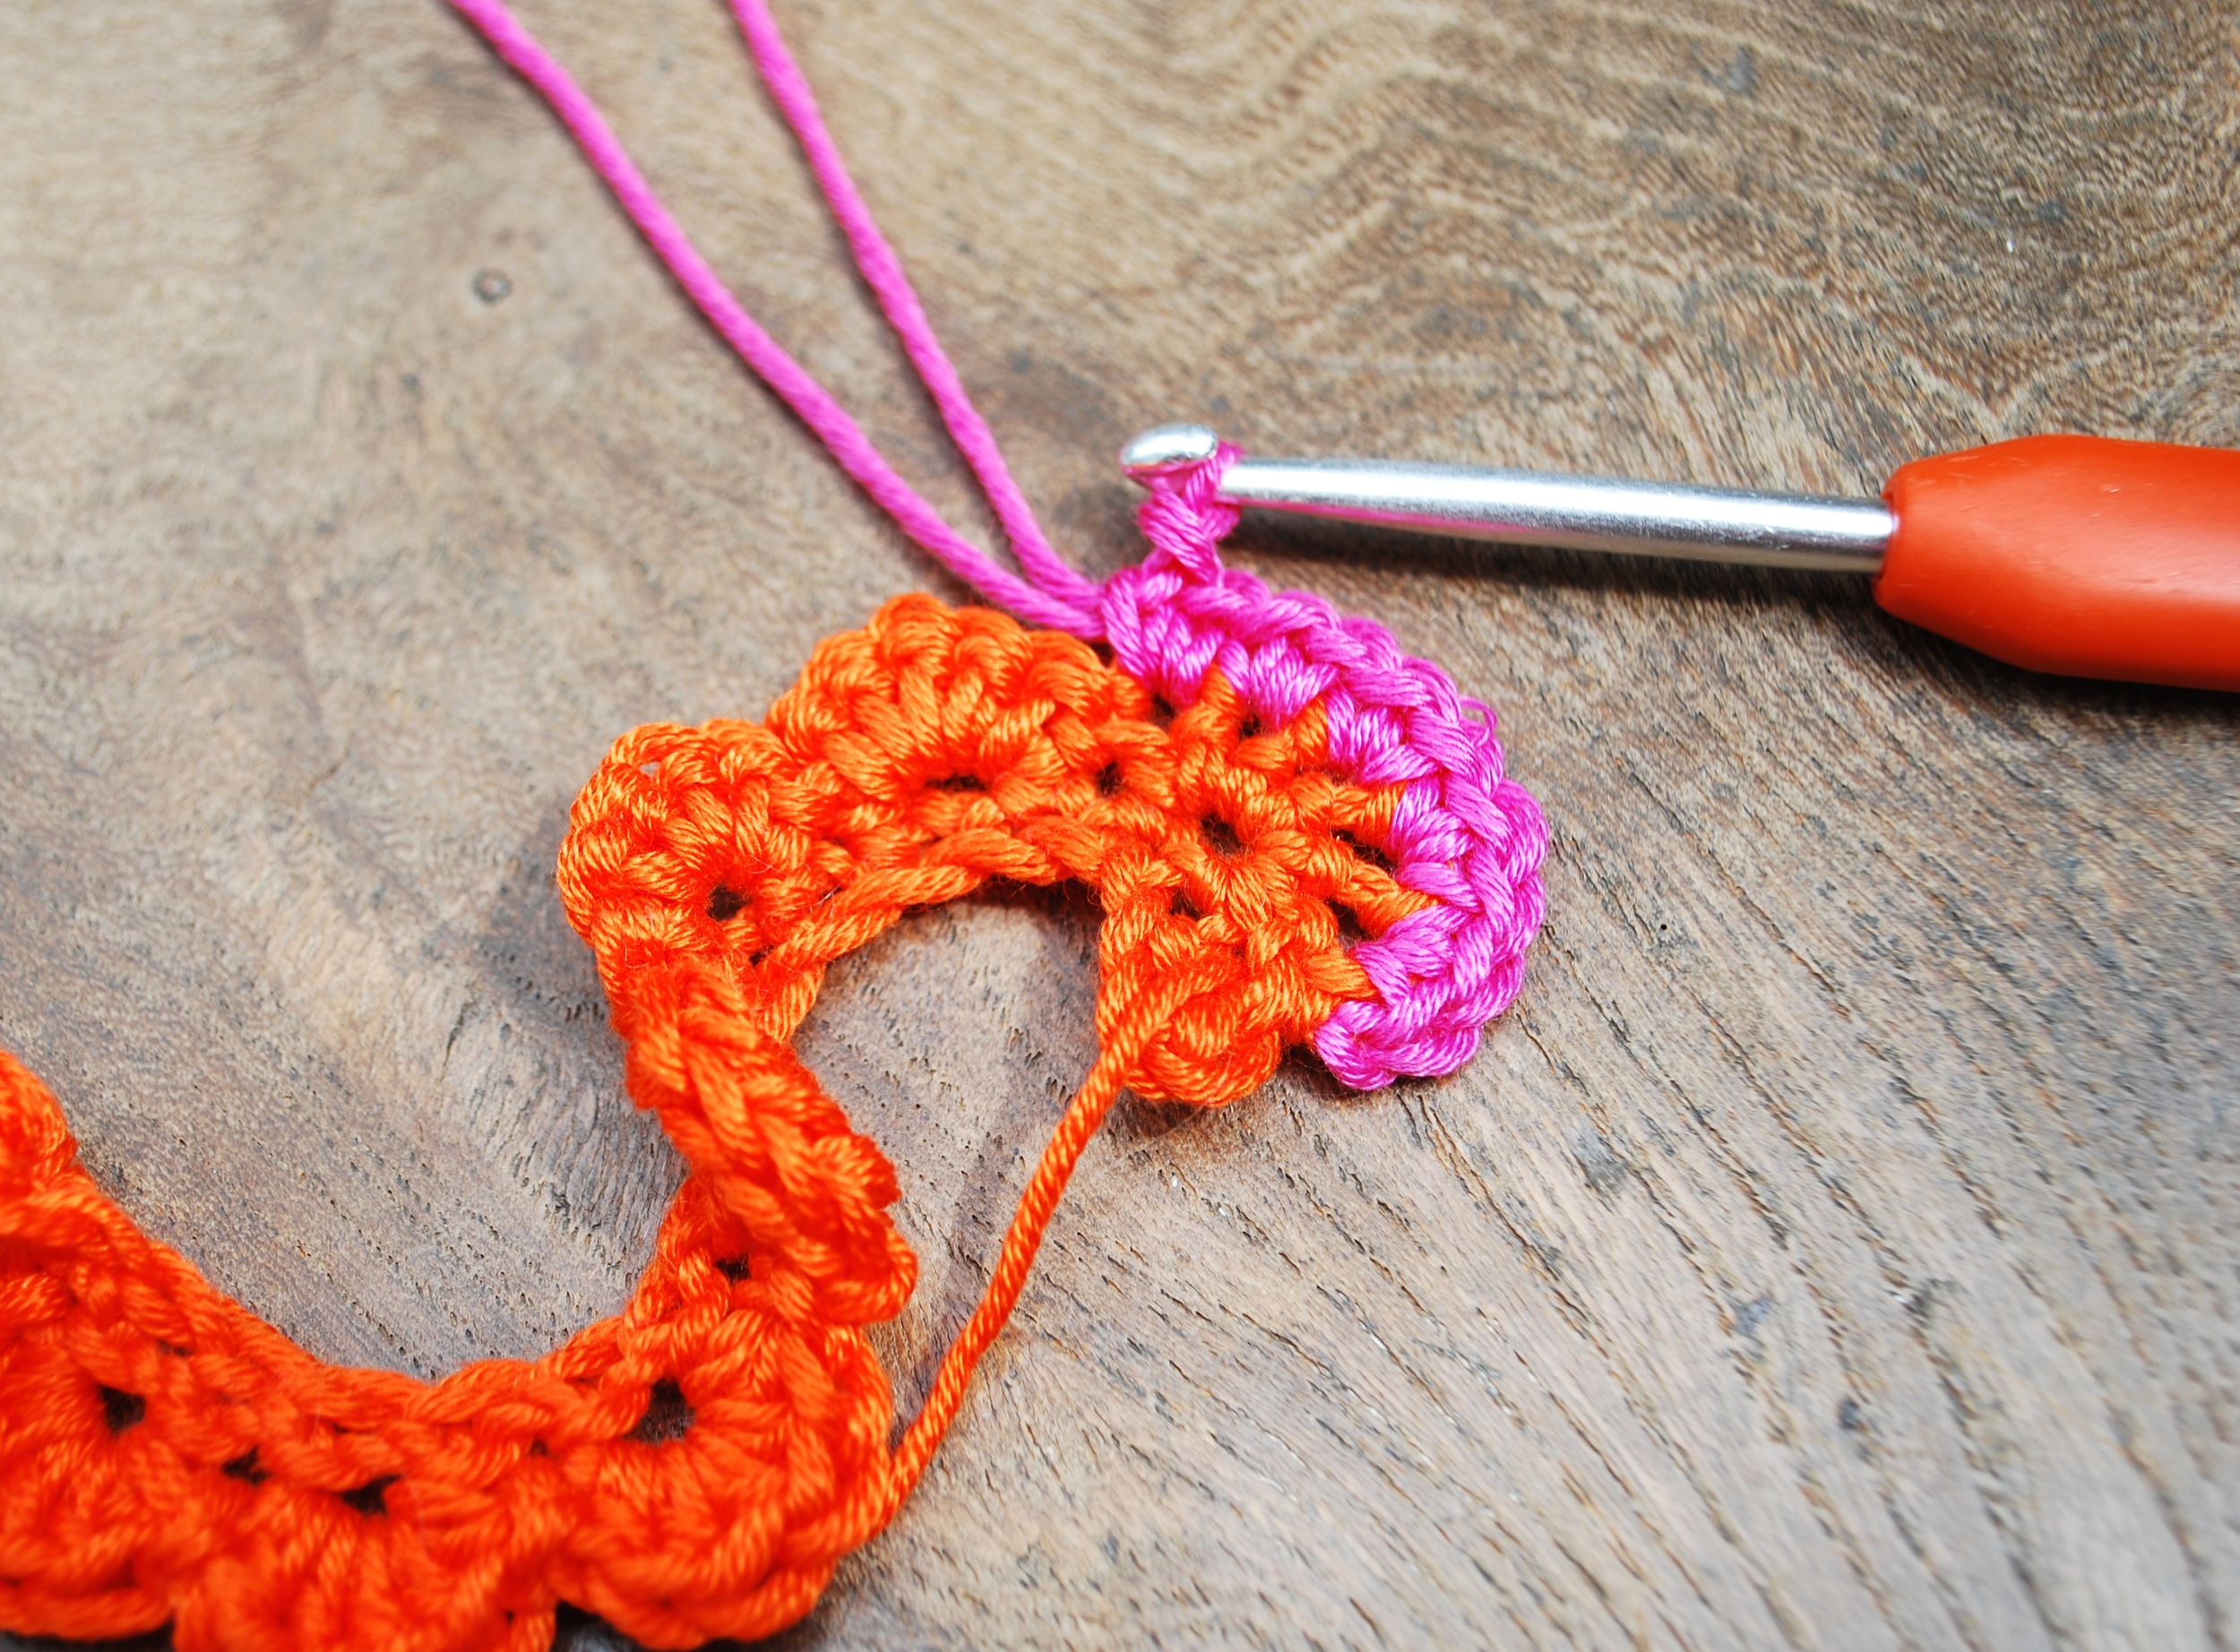
Repeat working 2 DC into each of the petal stitches.

You will have worked 2 DC into each of the 5 petal stitches (10 DC in total). Work 1 SS into the same SS from the row below.
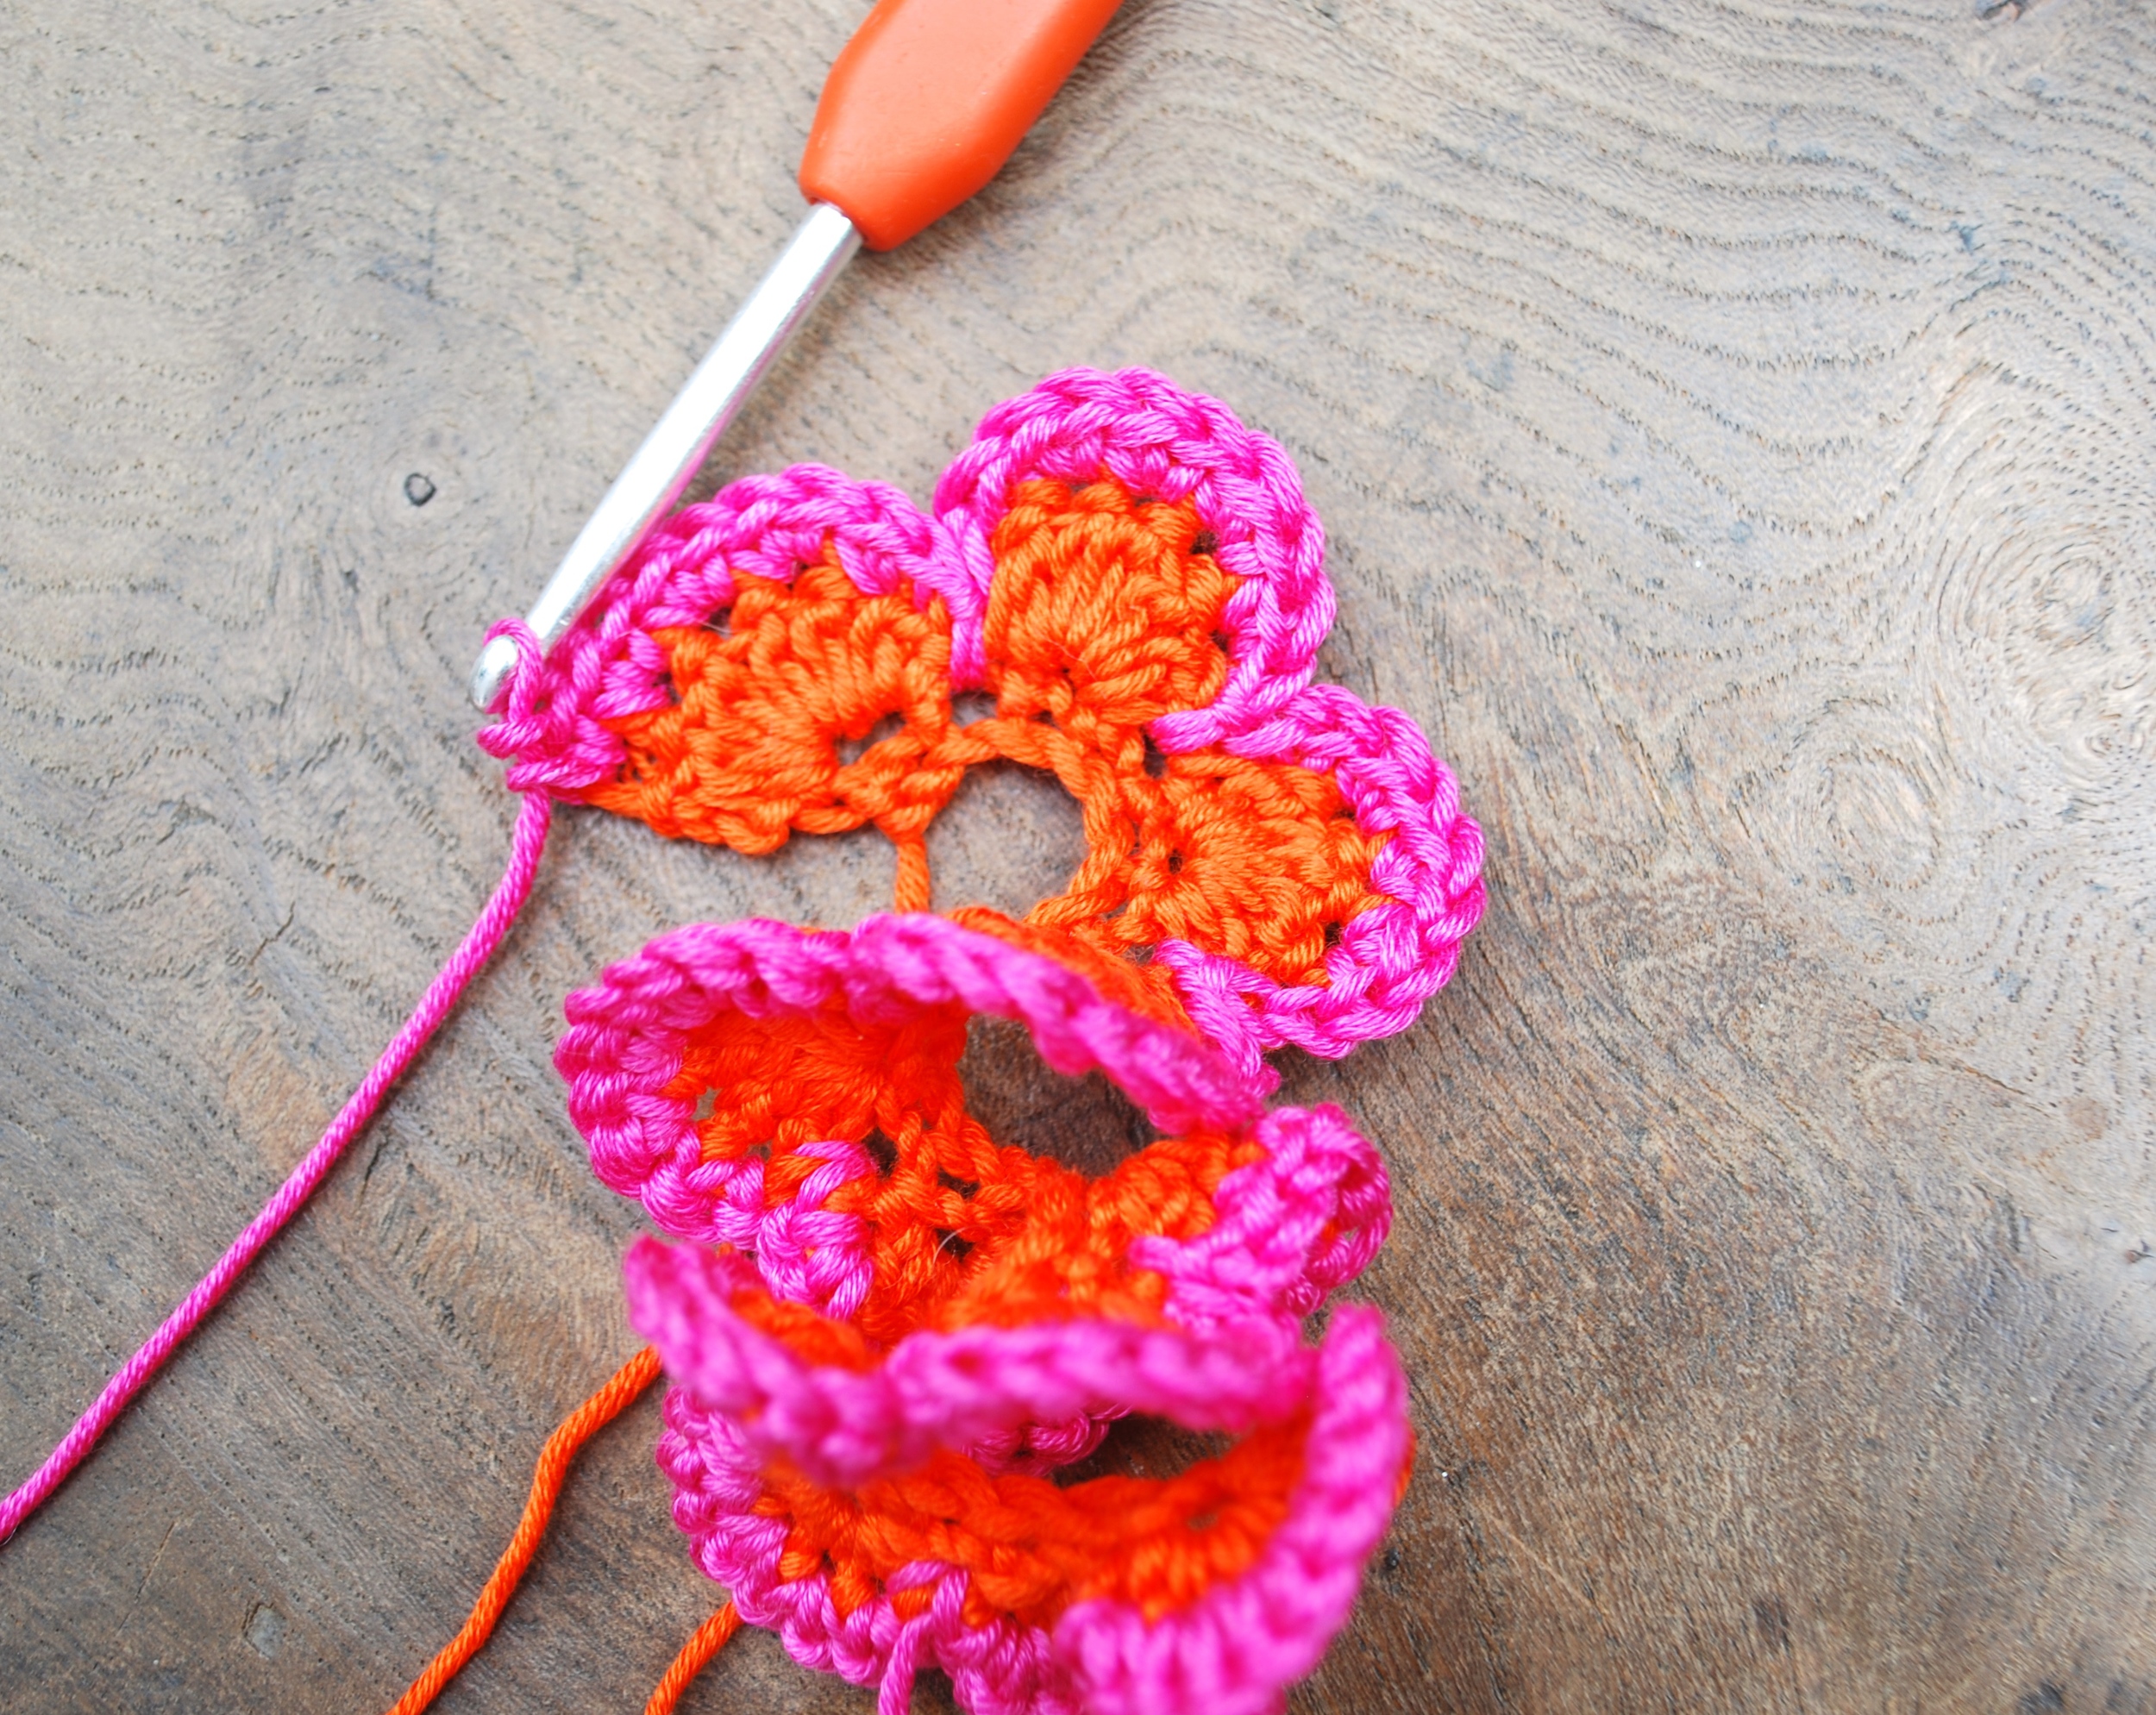
Repeat this process all the way along the top of your rose working 2 DC into every petal stitch followed by a SS into the SS from the row below. Cut your yarn leaving a 20 cm tail end and cast of your work.
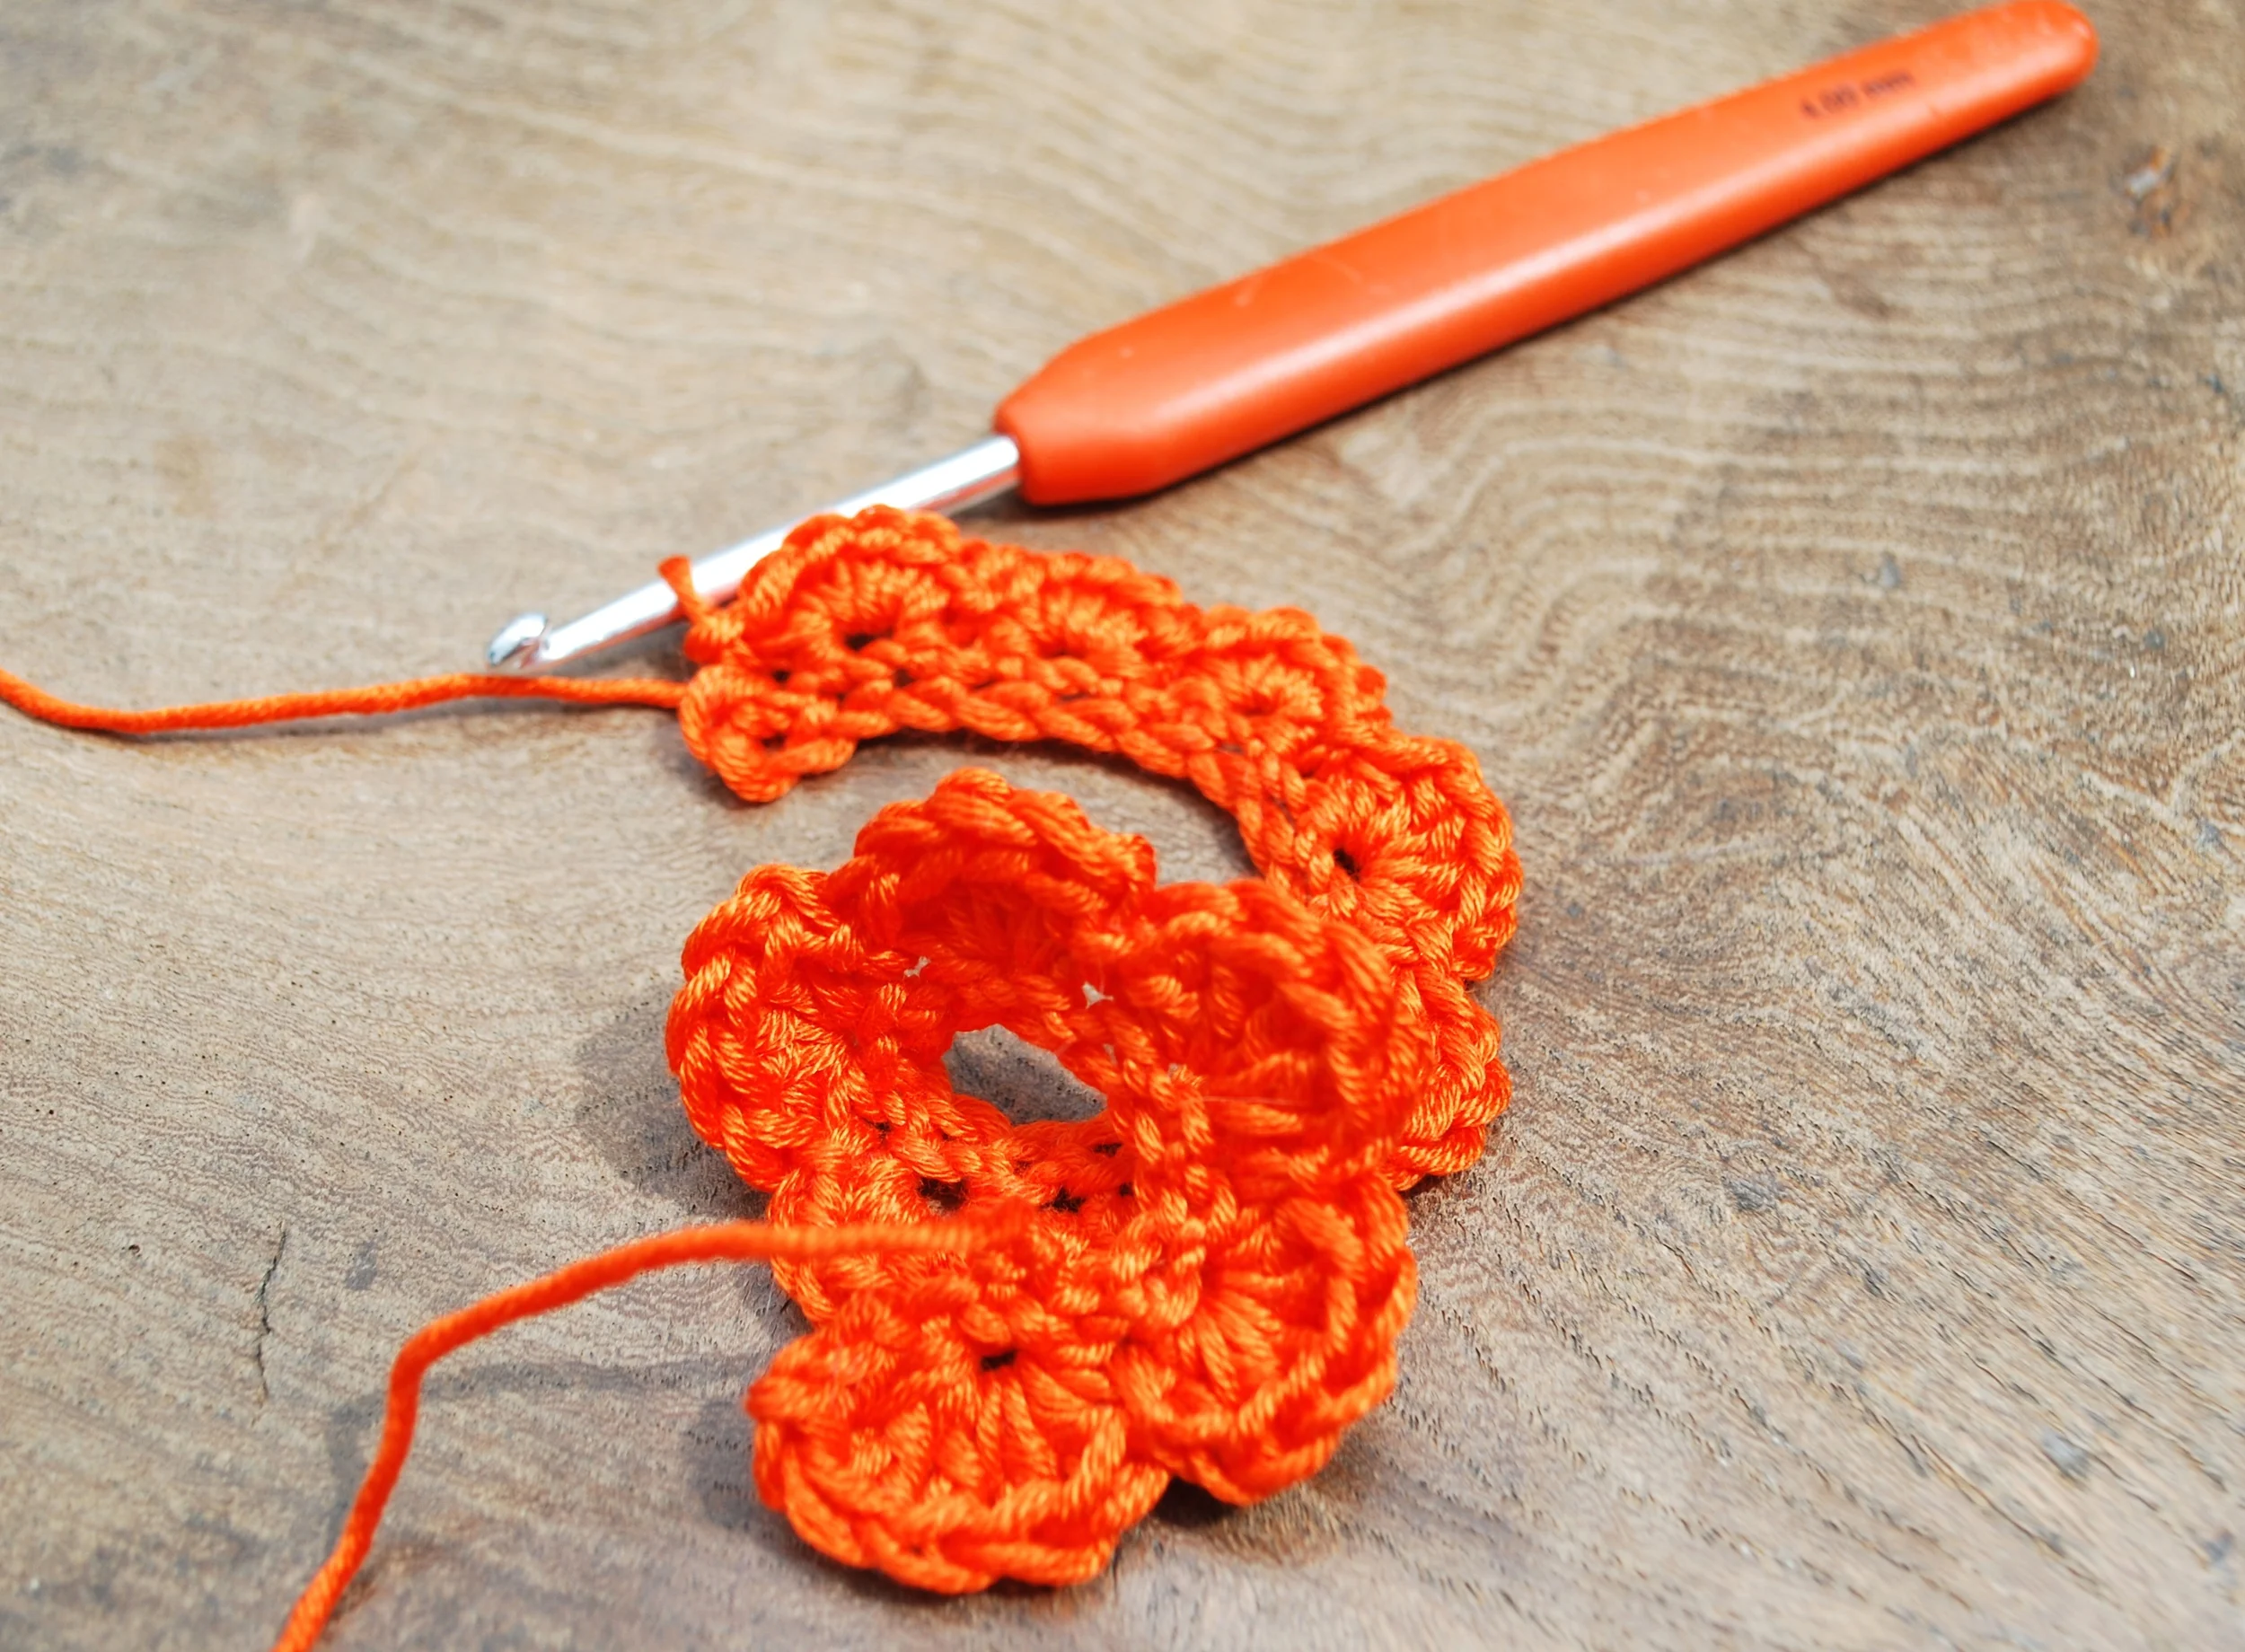
And now for the 'reveal'! Starting with the smallest petals in the middle carefully wind your rose around the smallest petals ending with the large ones on the outside edge. This can be a bit of a fiddle to begin with but you will soon get the hang of it

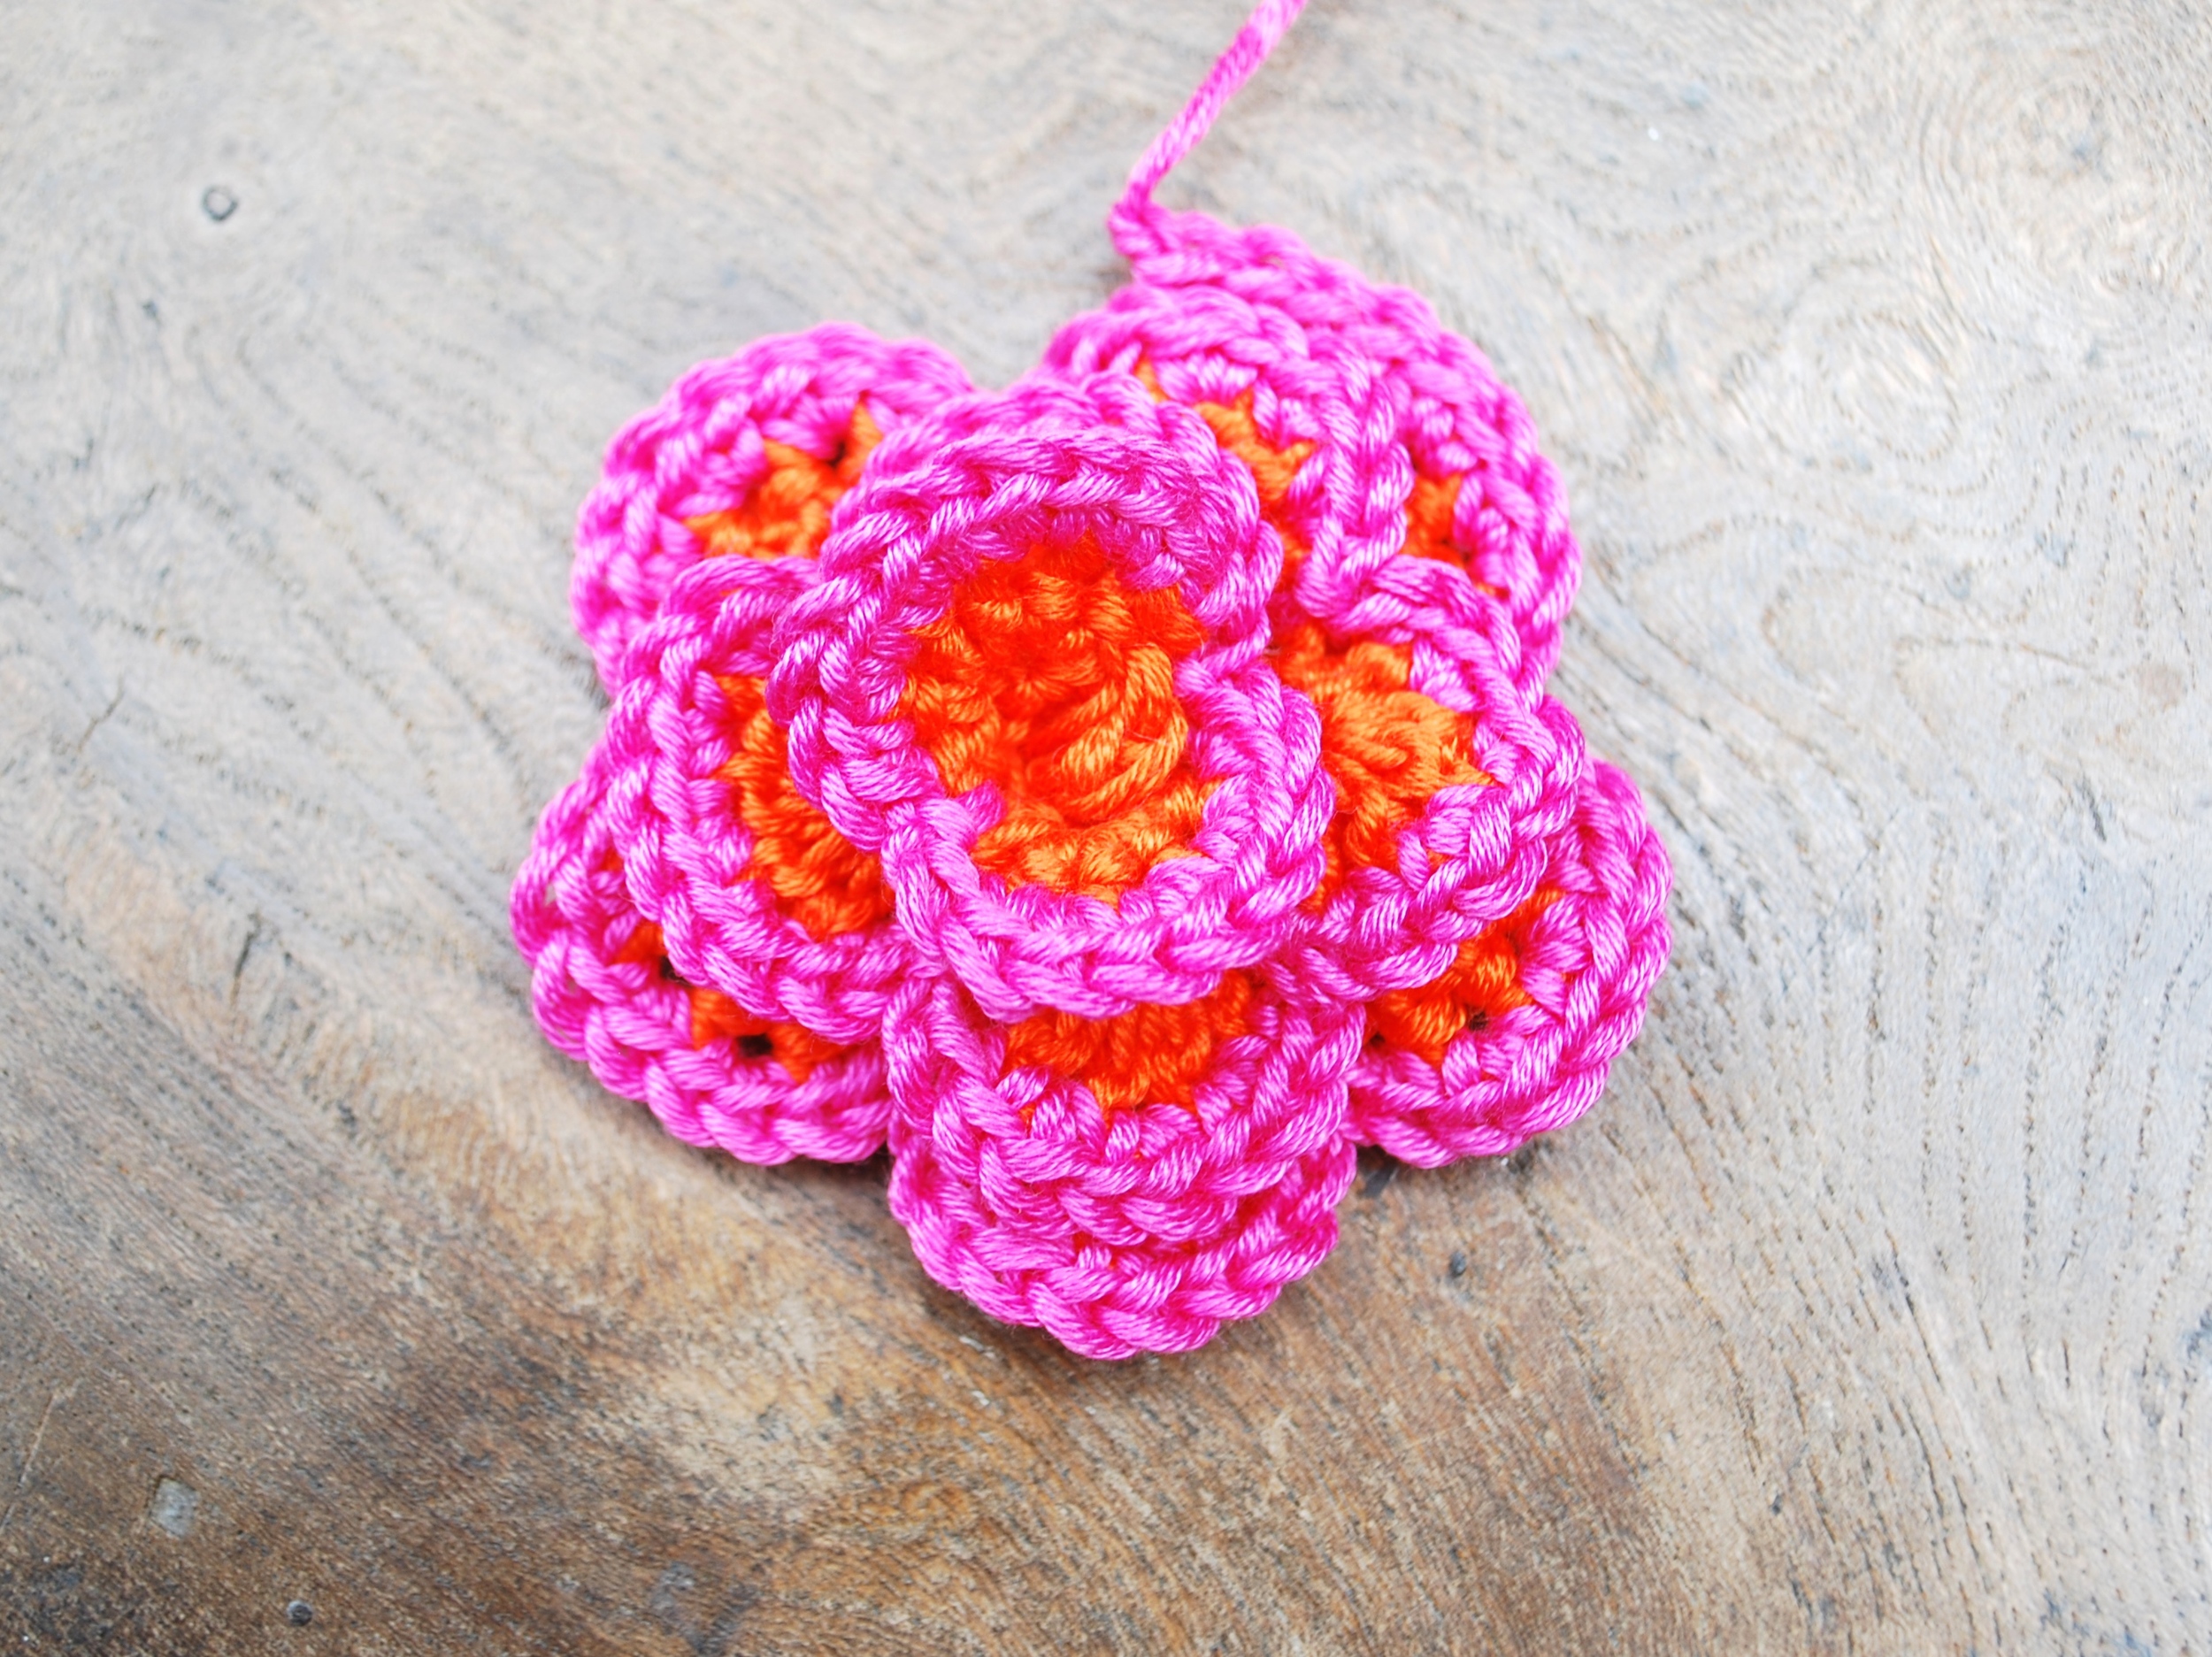
Carefully turn your rose over and thread your needle with the long tail end. Sew the back of the rose together making sure it is completely secure. It doesn't need to be neat because you won't see this bit, it's just making sure your rose stays in shape.

And there you have it! Anyone who knows me won't be the least bit surprised that I have chosen a deep orange and hot pink combination as it's my absolute favourite!
Now all you need do is continue making roses to adorn and decorate your home, clothing, bags and furnishings...the world is your oyster! Try experimenting with different types of yarns to see the many ways you can vary this simple pattern to make a bouquet of beautiful roses.

