
• Home
  • SHOP
  • Gallery
  • About
  • Contact
Menu

EMMA LEITH

Author. Designer. Queen of Colour
  • Home
  • SHOP
  • Gallery
  • About
  • Contact
photo-305x211.jpg

Share The Valentine Love: Mosaic Tutorial

February 3, 2014

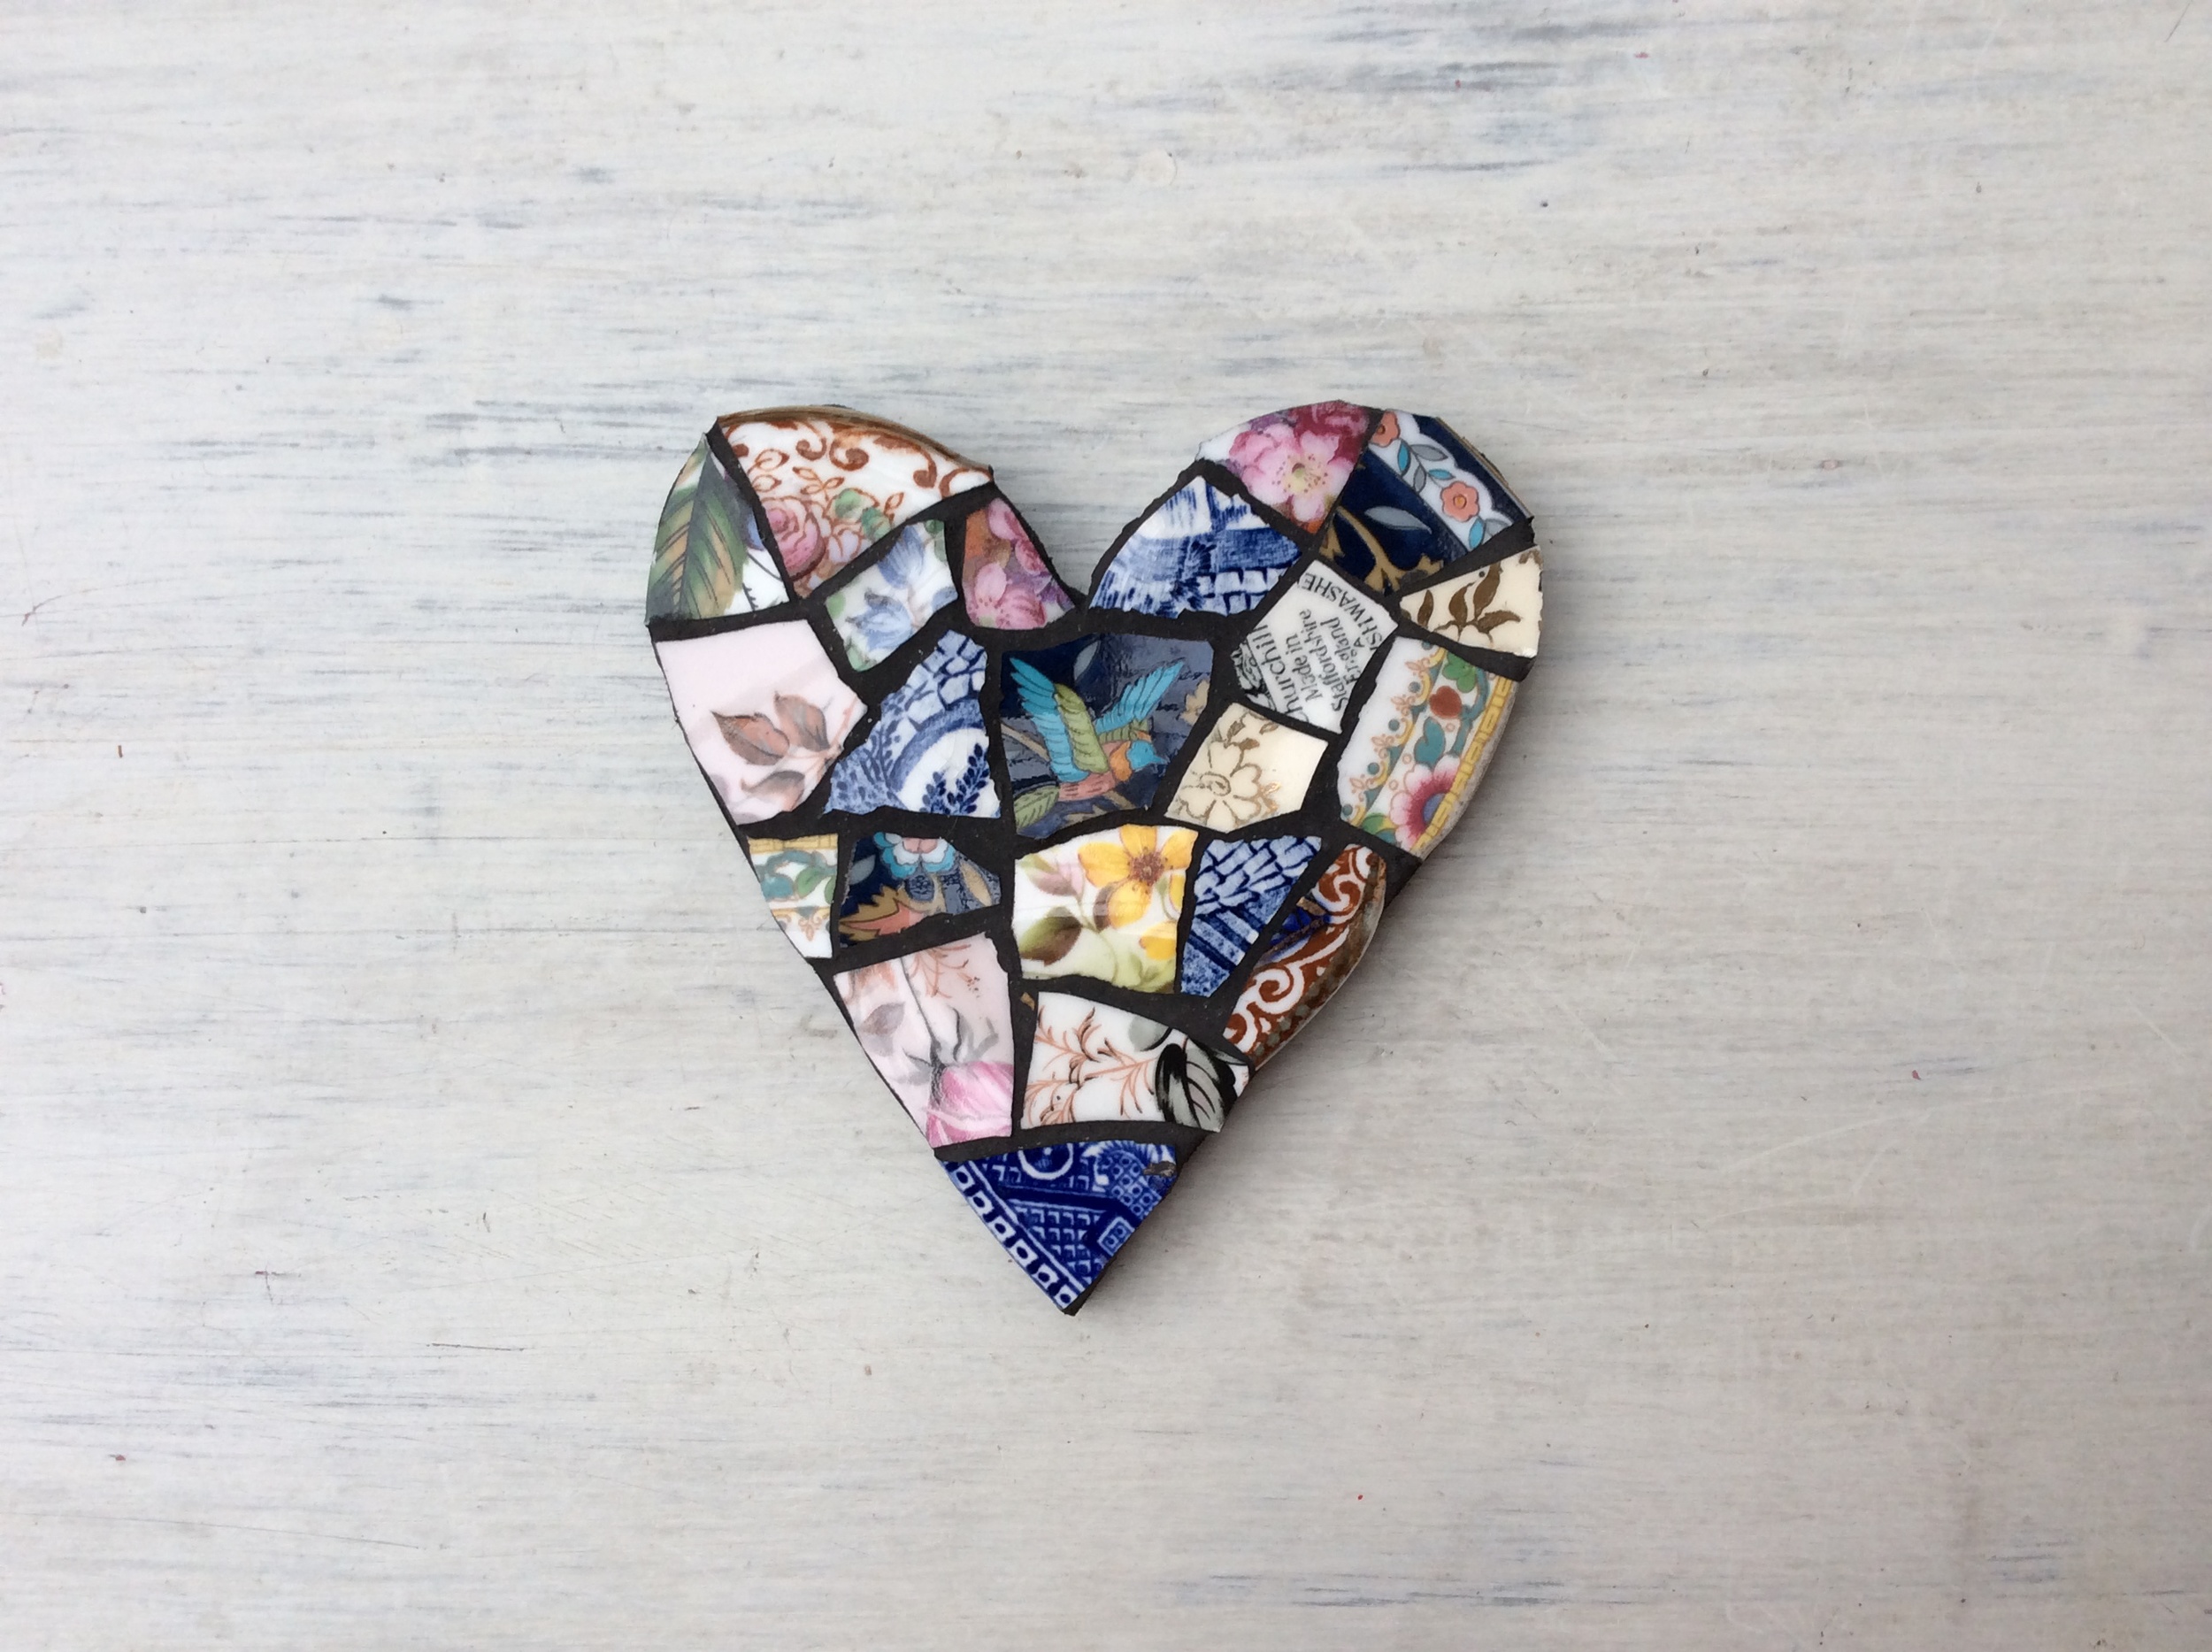
This week in my tutorial  I want to show you how to create and make a Mosaic in Eight Simple Steps. With Valentines Day round the corner this is a simple and beautiful gift to make for a loved one or to make with each other for your home.

You will need:

  1. 1 MDF heart shape. I cut mine with a hand held jigsaw - please remember how vital it is to wear a mask when cutting MDF.
  2. Tile adhesive - pre mixed from any hardware store.
  3. A Spatula (or in my case an old butter knife).
  4. Tile Nippers (or a hammer to break your china - I prefer to use nippers because I can shape each piece more precisely.)
  5. Old China plates and cups - gather and collect as much old china as you can from charity shops, car boots etc - become a magpie and give yourself as much choice as possible to create your mosaic. 
  6. A toothpick.
  7. Black Grout
  8. Black Paint (optional)
IMG_0011-305x211.jpg

1. Using your knife or spatula spread the tile adhesive across your MDF heart. It needs to be about 3-5mm thick.

IMG_0012-305x211.jpg

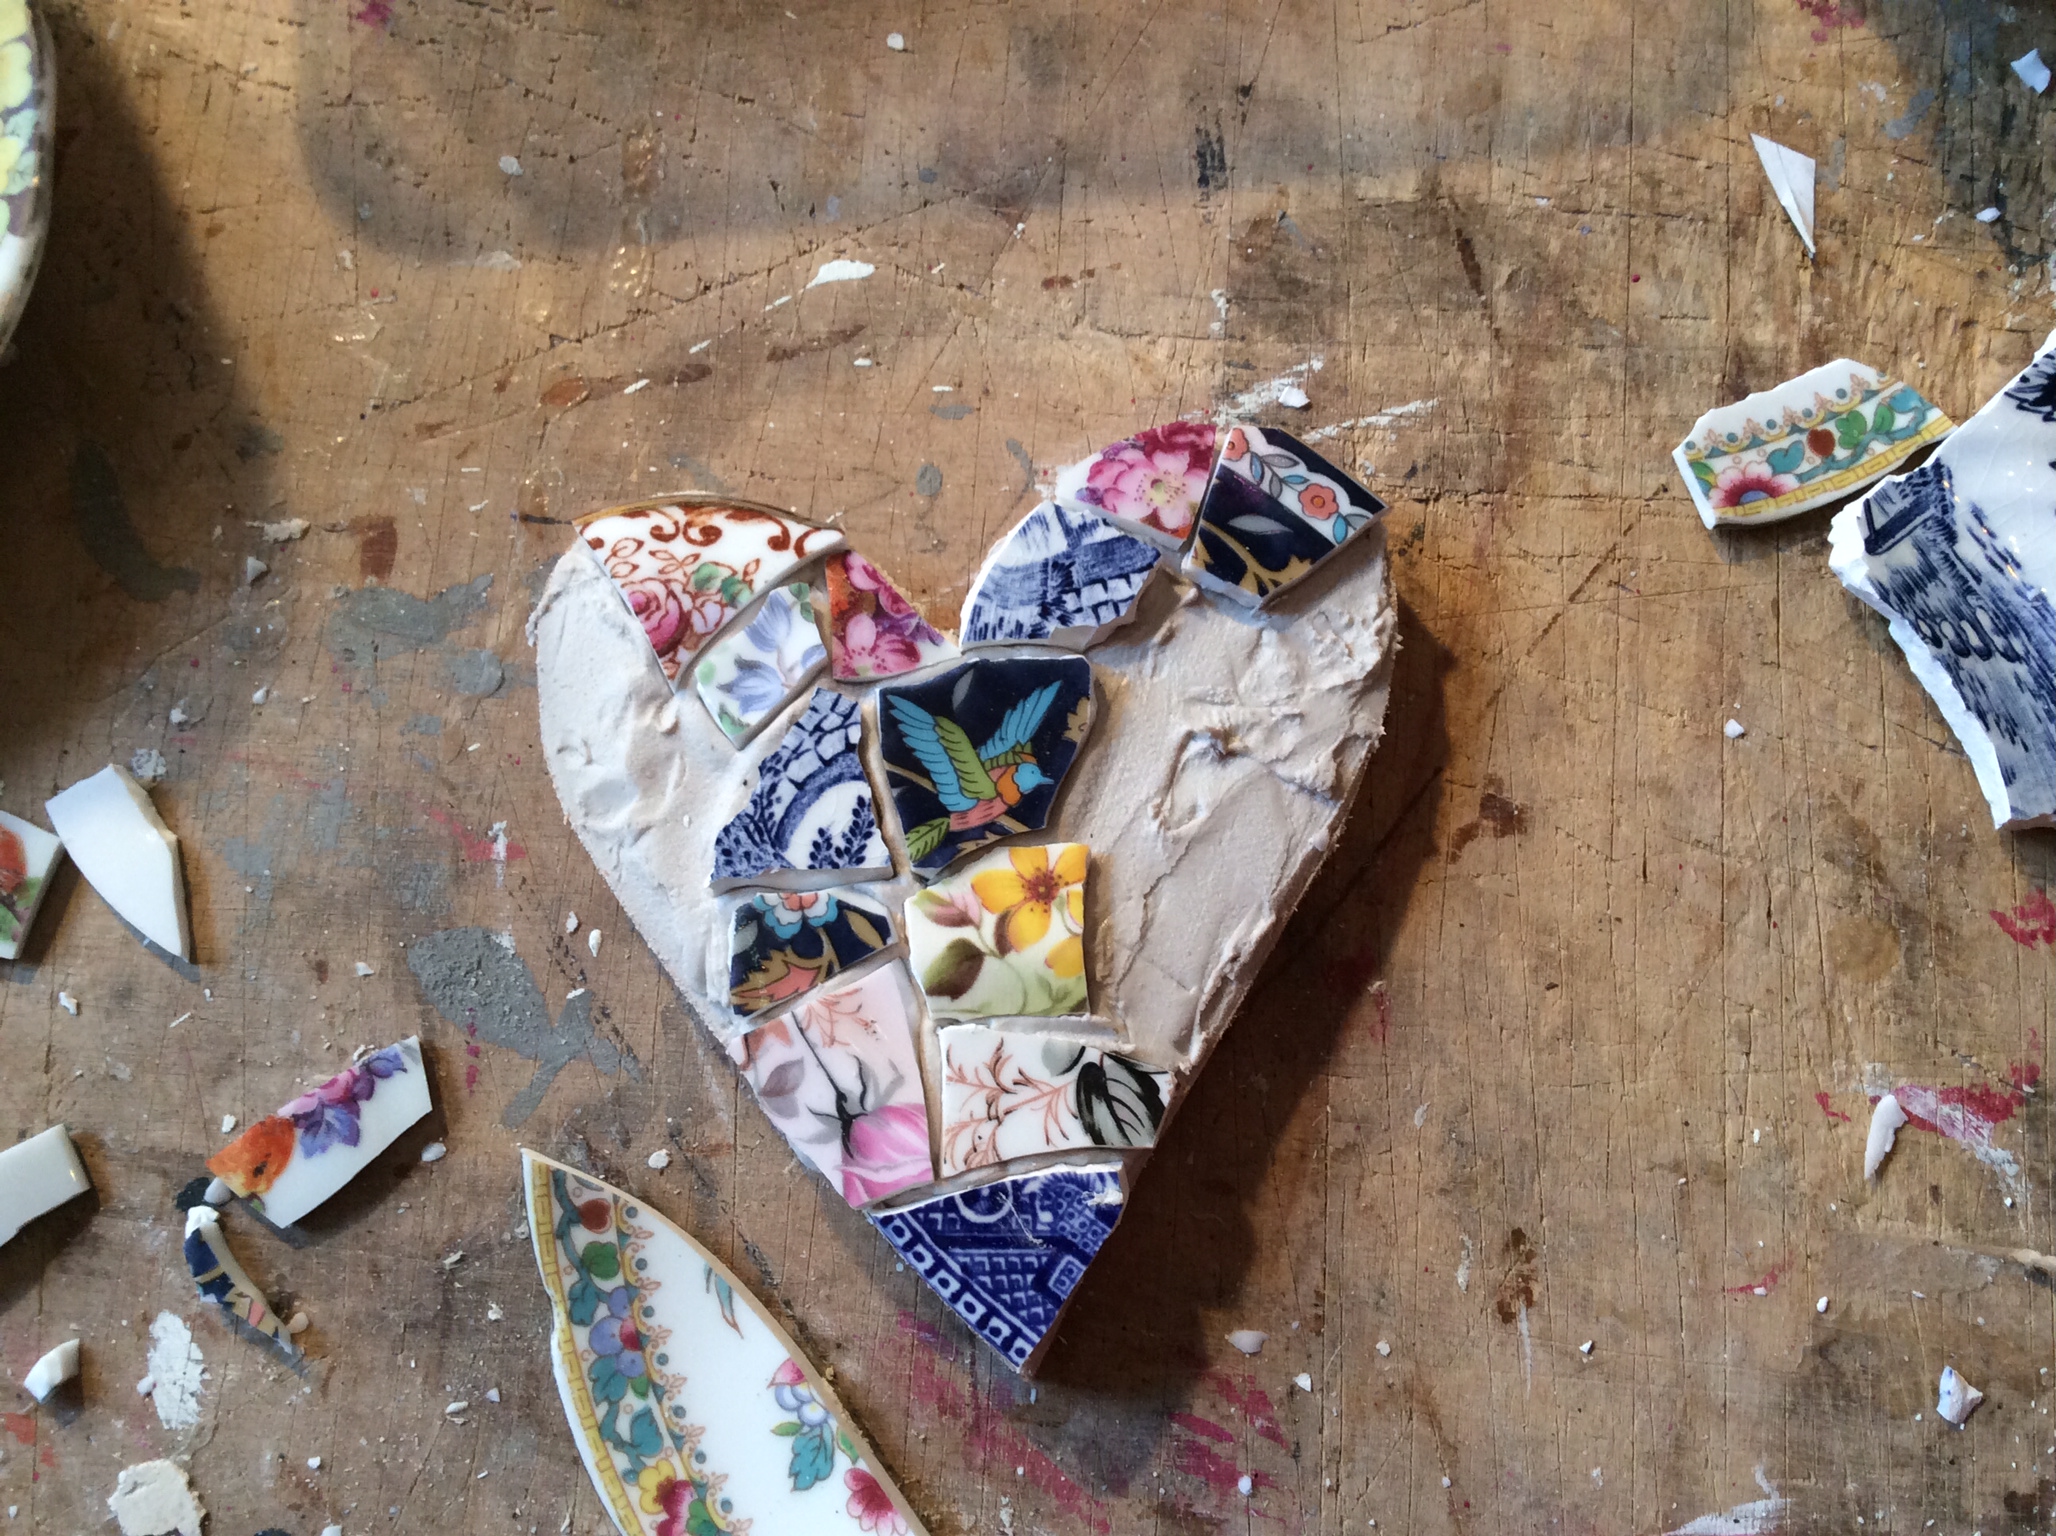
2. Gather your china and choose a piece that will look good in the centre. I’ve gone for a bird in this example but flowers look equally as beautiful.
IMG_0016-305x211.jpg

3. Cut it to the size you would like and rest it on the surface. Don’t push it into the tile adhesive just yet (although it is tempting!).

IMG_0014-305x211.jpg

4. Using your tile nippers start to cut some other china and place these pieces around your central piece and the outside edge. NOTE - don’t let any of the china stick out over the edge of the MDF as it is vulnerable to being chipped off over time.

IMG_0016-305x211.jpg

5. As you work you need to pay attention to the gaps between the tiles/china. Ideally you want them to be roughly the same in other word no big spaces between the china because when you come to grout your work every space will be filled with grout and if they are too big then the china gets lost a little. This is the art of mosaic. Paying attention not just to your tiles but to the spaces in-between.

6. Once your heart is completely covered and you are happy with it (and there are no bits sticking over the edge) then the next thing to do is very gently press each tile into the adhesive….not too hard! You will notice that the adhesive ‘squidges’ up between the gaps.

IMG_0018-copy-305x211.jpg

7. You need to get your toothpick and carefully remove all the excess adhesive. It is fiddly but well worth it because we are going to grout this with black grout and we don’t want white tile adhesive to be peeping through.

8. You need to leave your masterpiece to completely dry. This takes at least 24 hours. Do not be tempted to rush it as the tiles may well lift off before it’s set. Once it is set you can grout your heart. 

See my Grouting Tutorial here.

photo-305x211.jpg

Once grouted I like to tidy the edges with a little black paint to finish it off beautifully. Now wrap it up in some delicious gift wrap and give it to the one you love…….or keep it for yourself as a reminder of just how amazing you are

In Mosaic
← Pretty Elbow Patches Grouting Mosaic Tutorial →

Patterns

Featured
Metropolis Mitts
Metropolis Mitts
£3.50

Enjoy winter like never before with these adorable mitts that are guaranteed to get noticed! They are a heady mix of style and function combining a joyous blend of colours whilst being warm and cosy to wear. What’s not to love? Given a good box set and an uninterrupted weekend of crochet you can hook a pair in no time at all!

Mitts are worked using a 3mm hook and Scheepjes Metropolis yarn in a variety of colours. All the shades used in these samples are listed in the pattern and most 4ply yarns this can be used as a substitute (Its the same weight as most sock yarns). Each glove is made of two squares joined together across two sides leaving space for the thumb opening. Edging is added around the top and the bottom and is where the creative magic happens. Once you have worked a few rounds you will be free to follow the sequence to the letter or go off piste and create your own colour versions, adding more rows to make the wrist part as long as you like!

Read more →
Cosy Cable Blanket
Cosy Cable Blanket
£3.50

Made with snuggling in mind this chunky blanket is a glorious blend of colour and comfort that will look equally lovely draped across a bed or sofa. Inspired by classic cable sweaters the simple repeating cable pattern works beautifully to create a warm and stylish patchwork blanket. This is the perfect project for those wishing to dip their toe into the world of cable crochet without getting lost in it! Once you have mastered the first 19 rows its just a simple repeat with colour changes creating the patchwork effect.

This patterns includes full written instructions together with a chart detailing every stitch row by row. There is also a little colour diagram to help you with the layout and all the colours used are listed. I have used Rico Design Mega Wool Chunky which is a blend of 55% wool and 45% acrylic (100g/125m) but any chunky weight yarn will work.

The blanket is constructed from six strips, and each strip has seven ‘patches’. The strips are crocheted together (so no sewing!) and finished with a super simple border and tassels at each end.

Read more →
Bright Lights C2C Crochet Blanket
£3.50

Inspired by the bright colours and bold shapes of Moroccan Boucherouite rugs this blanket is perfect for anyone wishing to add a splash of colour to their lives. It will brighten up any bed and look equally at home hung over the sofa for cozy nights in front of the tv. This blanket is a firm favourite with all the family and the pattern is easily adapted to be as large or as small as you like.

This blanket is worked using a 7mm hook and a chunky, aran weight yarn in a selection of bright colours making it a great ‘stash-buster’ project. Emma used Scheepjes Chunky Monkey and the yarn colours and quantities are listed in the pattern. You can watch Emma teach you how to crochet C2C in the round here however please be aware that part two of the video differs to the final pattern for this blanket (but the video is perfect to get you going!)

Read more →
Rainbow's End Crochet Stash-Buster Blanket
£3.50

It’s time to dive into that yarn stash and get hooking this timeless classic! The pattern is designed to use all those leftover part balls from previous projects and get you feeling the joy of working with colours as you move through the rainbow spectrum from cool blues to hot pinks. The easy to follow pattern lists all the colours and quantities used for those wishing to top up their stash and replicate the sample you see here and you can use any combination of colours to suit your mood. The border can be any colour and would look equally as beautiful in grey or black.

Read more →
Mosaic Dream Crochet Blanket by Emma Leith.jpeg
Mosaic Dream Blanket
£4.50

Originally designed as a crochet along this blanket remains one of my all time favourites. The gentle grey tones of the main body of the blanket contrast beautifully with the bright pops of colour that push through the textured stitches to create a classical piece that will look good in just about any setting.

This blanket is worked using West Yorkshire Spinners Colour Lab DK pure wool which includes several balls of their self striping yarn. For a more budget friendly project any dk weight yarn can be used and the little ‘Floral Tiles’ that form the white middle border can be worked using any scraps of dk from your stash. All shades and quantities are listed in the pattern. With over 50 detailed step by step photos this pattern will hold your hand very step of the way and is ideally suited to the more experienced crocheter.

Please note this blanket does not include mosaic crochet technique despite its name!

Read more →
Dot to Dot Linen St Shawl
£3.00

Gentle on the mind and pleasing for the soul this simple pattern promises beautiful results every time. Detailed step by step colour photos accompany the easy to follow pattern to guide you every step (or stitch!) of the way. Included are full details of two colour palette options - autumn colours worked in double knit and a chunky yarn version using bright springtime colours. The double knit version includes a lovely picot edge finish with tips on how to achieve a relaxed drape. Linen stitch is a wonderful way to explore and play with colours making the perfect project for anyone wishing to brighten up their winter wardrobe!

Read more →
Sweet Clover Crochet Blanket
£3.50

Welcome to the Sweet Clover blanket which is designed to have you combing colours with ease. Made up of 42 squares using 20 balls of Ricorumi DK this blanket is packed full of colour and texture. At first glance it may seem a little complex but the Sweet Clover square is only 6 rounds and you get to repeat each square in any colour combination of your choice. The pattern walks you through 3 simple colour tips ensuring balance and harmony with any palette guaranteeing spectacular results every time. 35 colour photos accompany the written pattern guiding you every stitch of the way.

Read more →

Powered by Squarespace FAQS | PRIVACY | T’S & C’S