You will need:
1 Felting needle
1 Foam pad
1 Shape cutter (otherwise known as a pastry cutter!)
Felting wool (called roving wool which is simply wool that has been combed)
String
Normal sewing needle to thread the string
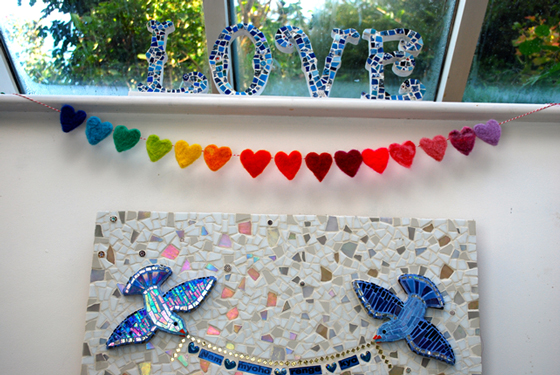
This beautiful bunting is a great introduction to felting; you can recreate it with any colours and shapes you like. A short string of felt shapes would make a magical Christmas tree decoration or a long string could decorate a whole room all year round. Just follow these 10 easy steps.
Before you start, look closely at the needle and you will see little barbs on the tip. These barbs drag the wool fibres into each other and mesh them together. The more you stab (ooo that sounds nasty, shall we say needle?) the more the fibres mesh together thickening the wool and turning it into felt. Think woolen jumper put into a hot wash by accident - it’s exactly the same process! All the woolen fibres tangle together getting tighter and tighter, shrinking your lovely jumper, or in the case of felting, creating your shape.
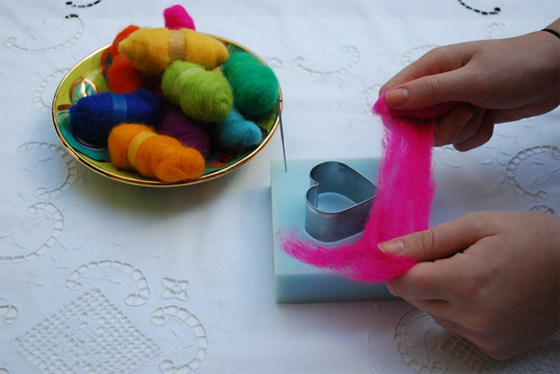
1. Take some of your wool and pull it from the main ball.
Top tip - Never cut roving wool, always pull it apart to avoid damaging the fibres.

2. Stuff it into your shape cutter. I'm using a heart but you could use ANY shape large or small. Don’t overfill - you want just enough that it sits comfortably in the shape and is not bursting out.

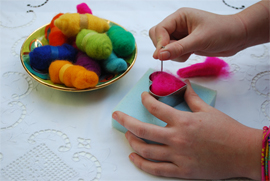
3. Gently stab the wool with the needle. Don’t push the needle all the way into the foam pad. Remember those barbs? That’s as far as the needle needs to go in.
Top tip - punch the needle straight down at 90 degrees. Try to avoid angling it too much as you run the risk of breaking the needle against the shape cutter.

4. Keep needling/stabbing the felt until it has compacted down by 50%.
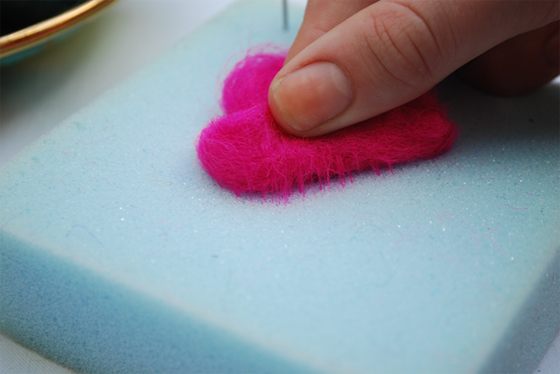
5. Remove the shape cutter and turn the felt 'shape' over. Don't worry if it doesn't yet resemble the shape ....it will. Notice the fibres in the foam pad? Thats the barbs in the felting needle doing their job!

6. Place the felt back in the shape and continue working it with the needle concentrating on edges to get the shape definition. I tend to repeat this process of turning the felt over several times for each side. It will depend upon how much wool you use. The more you needle the wool, the denser it becomes.

7. Once you are happy with it. Remove the shape cutter and shape the detail with the needle. Be careful not to stab your finger!
8. Repeat this entire process using different coloured roving wool to create a rainbow of coloured shapes.

9. Once you have a good selection, thread them together to create your bunting.


10. Hang up your beautiful creation with pride!