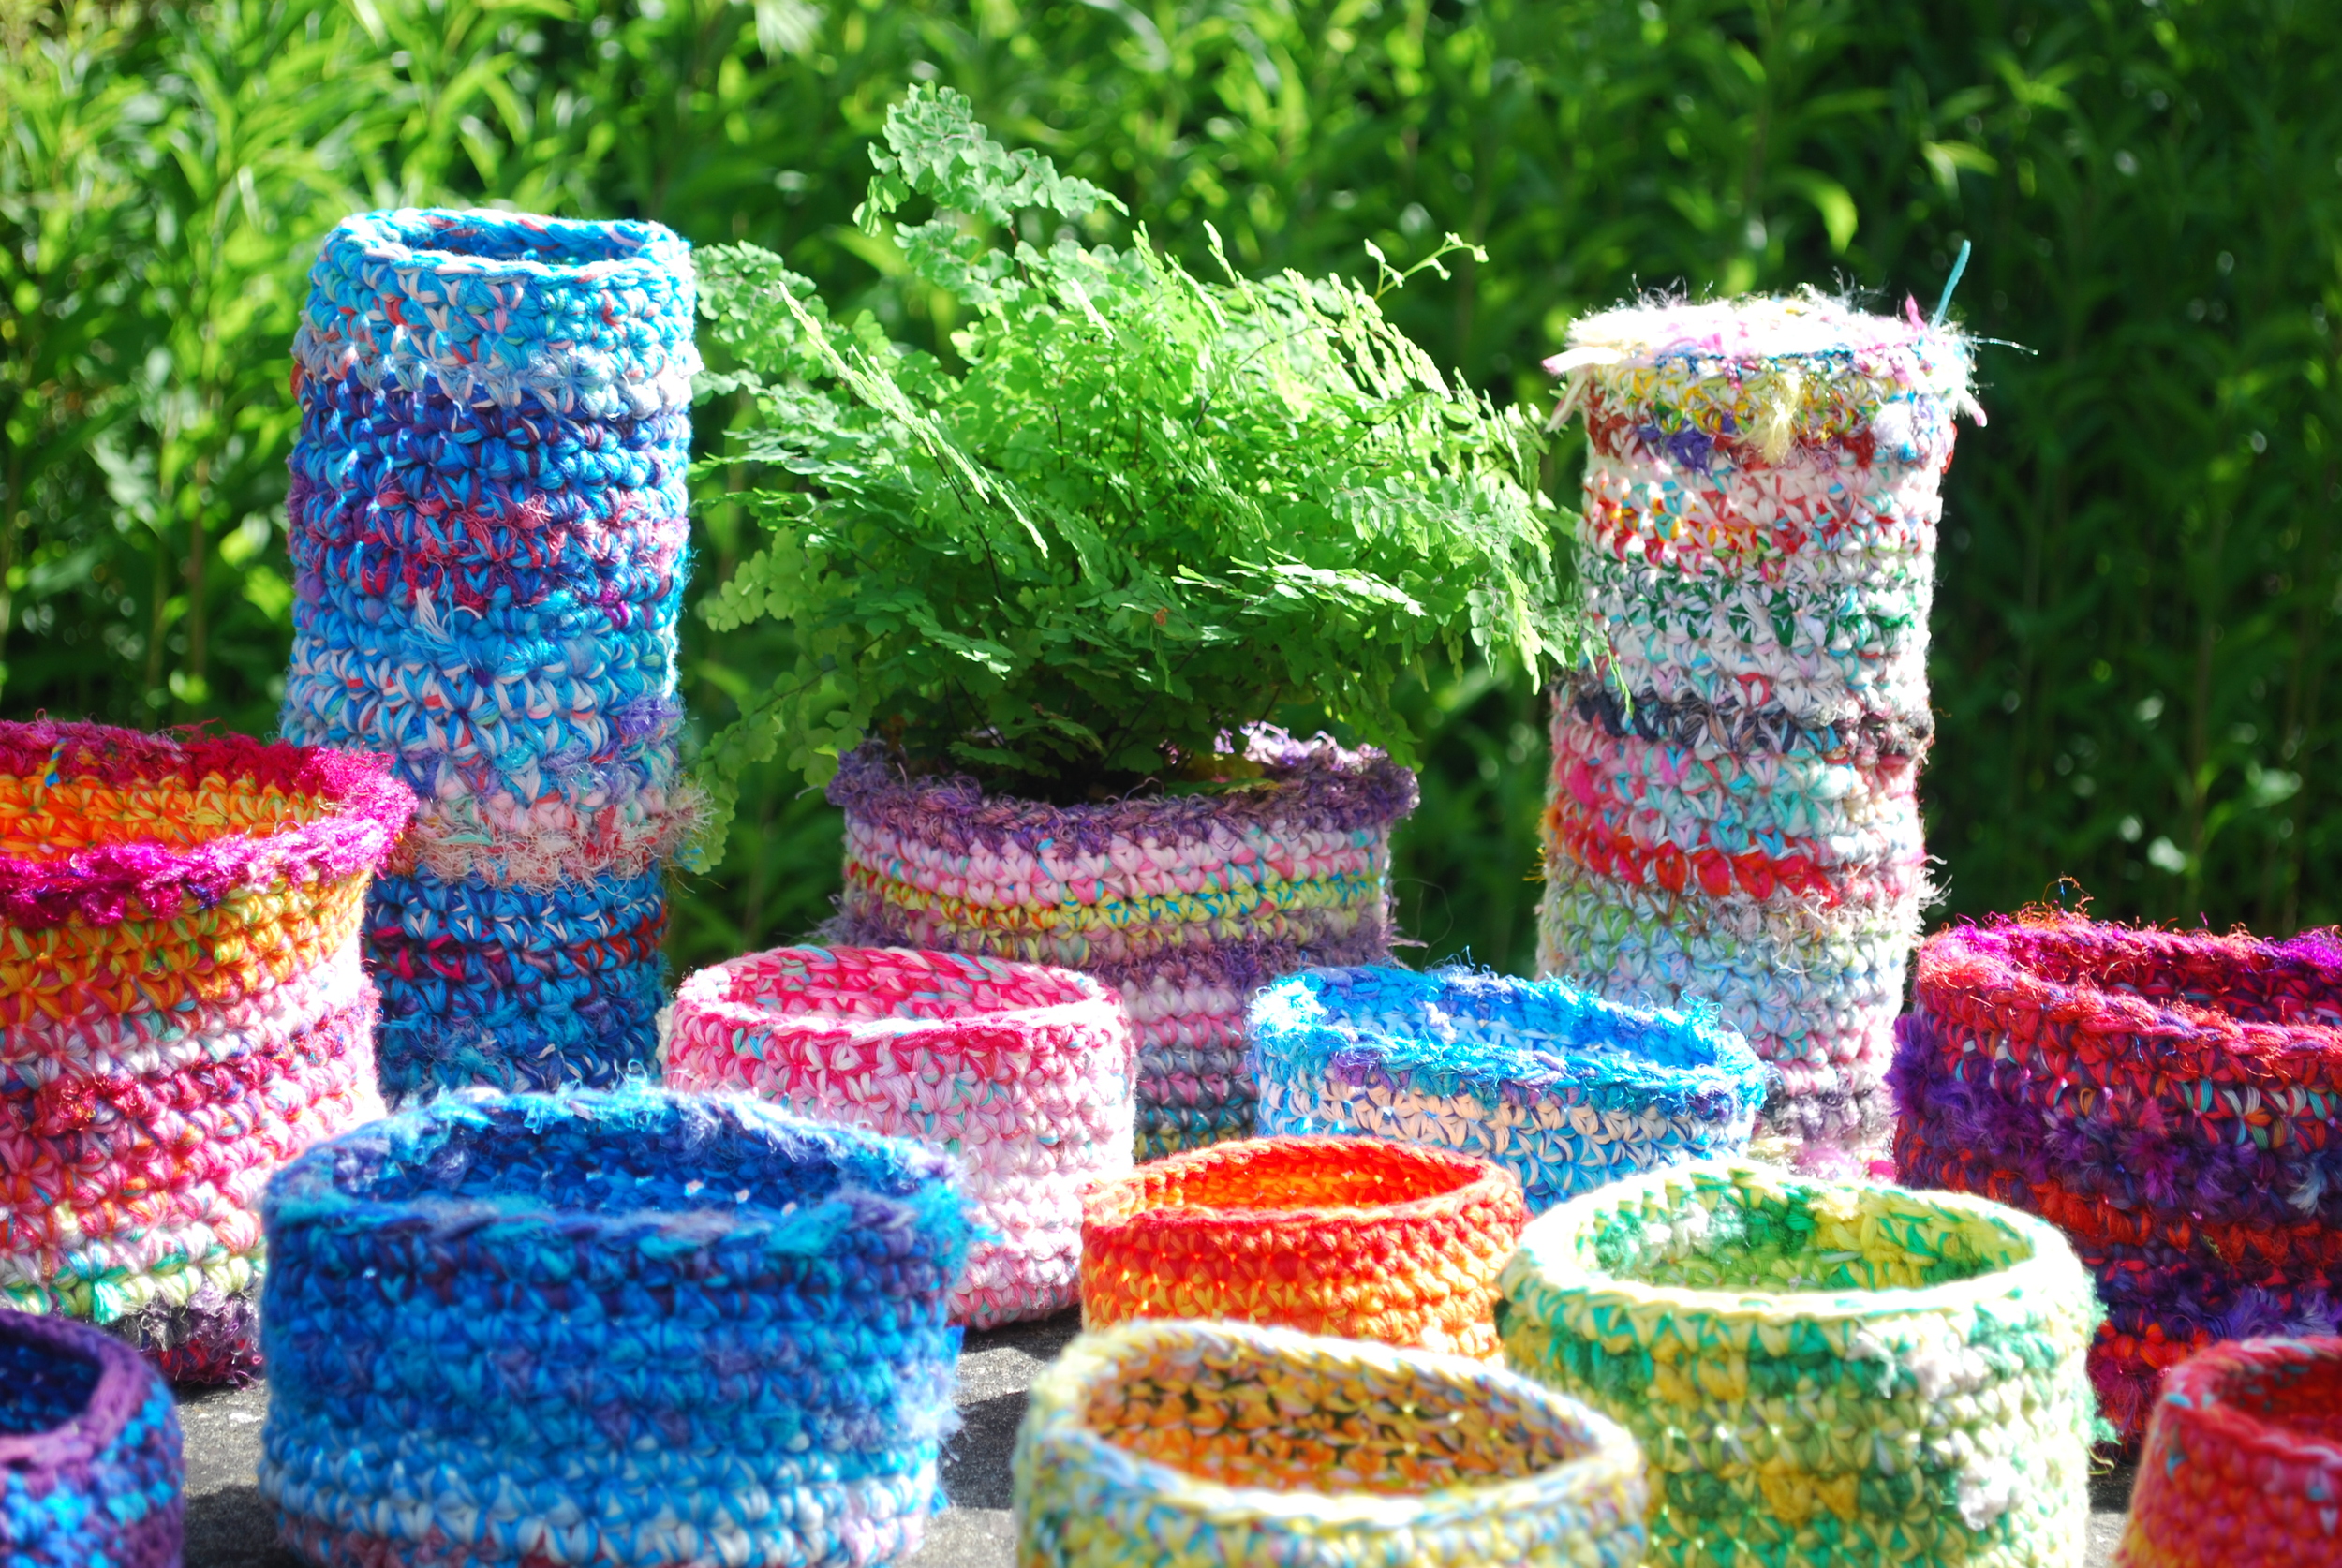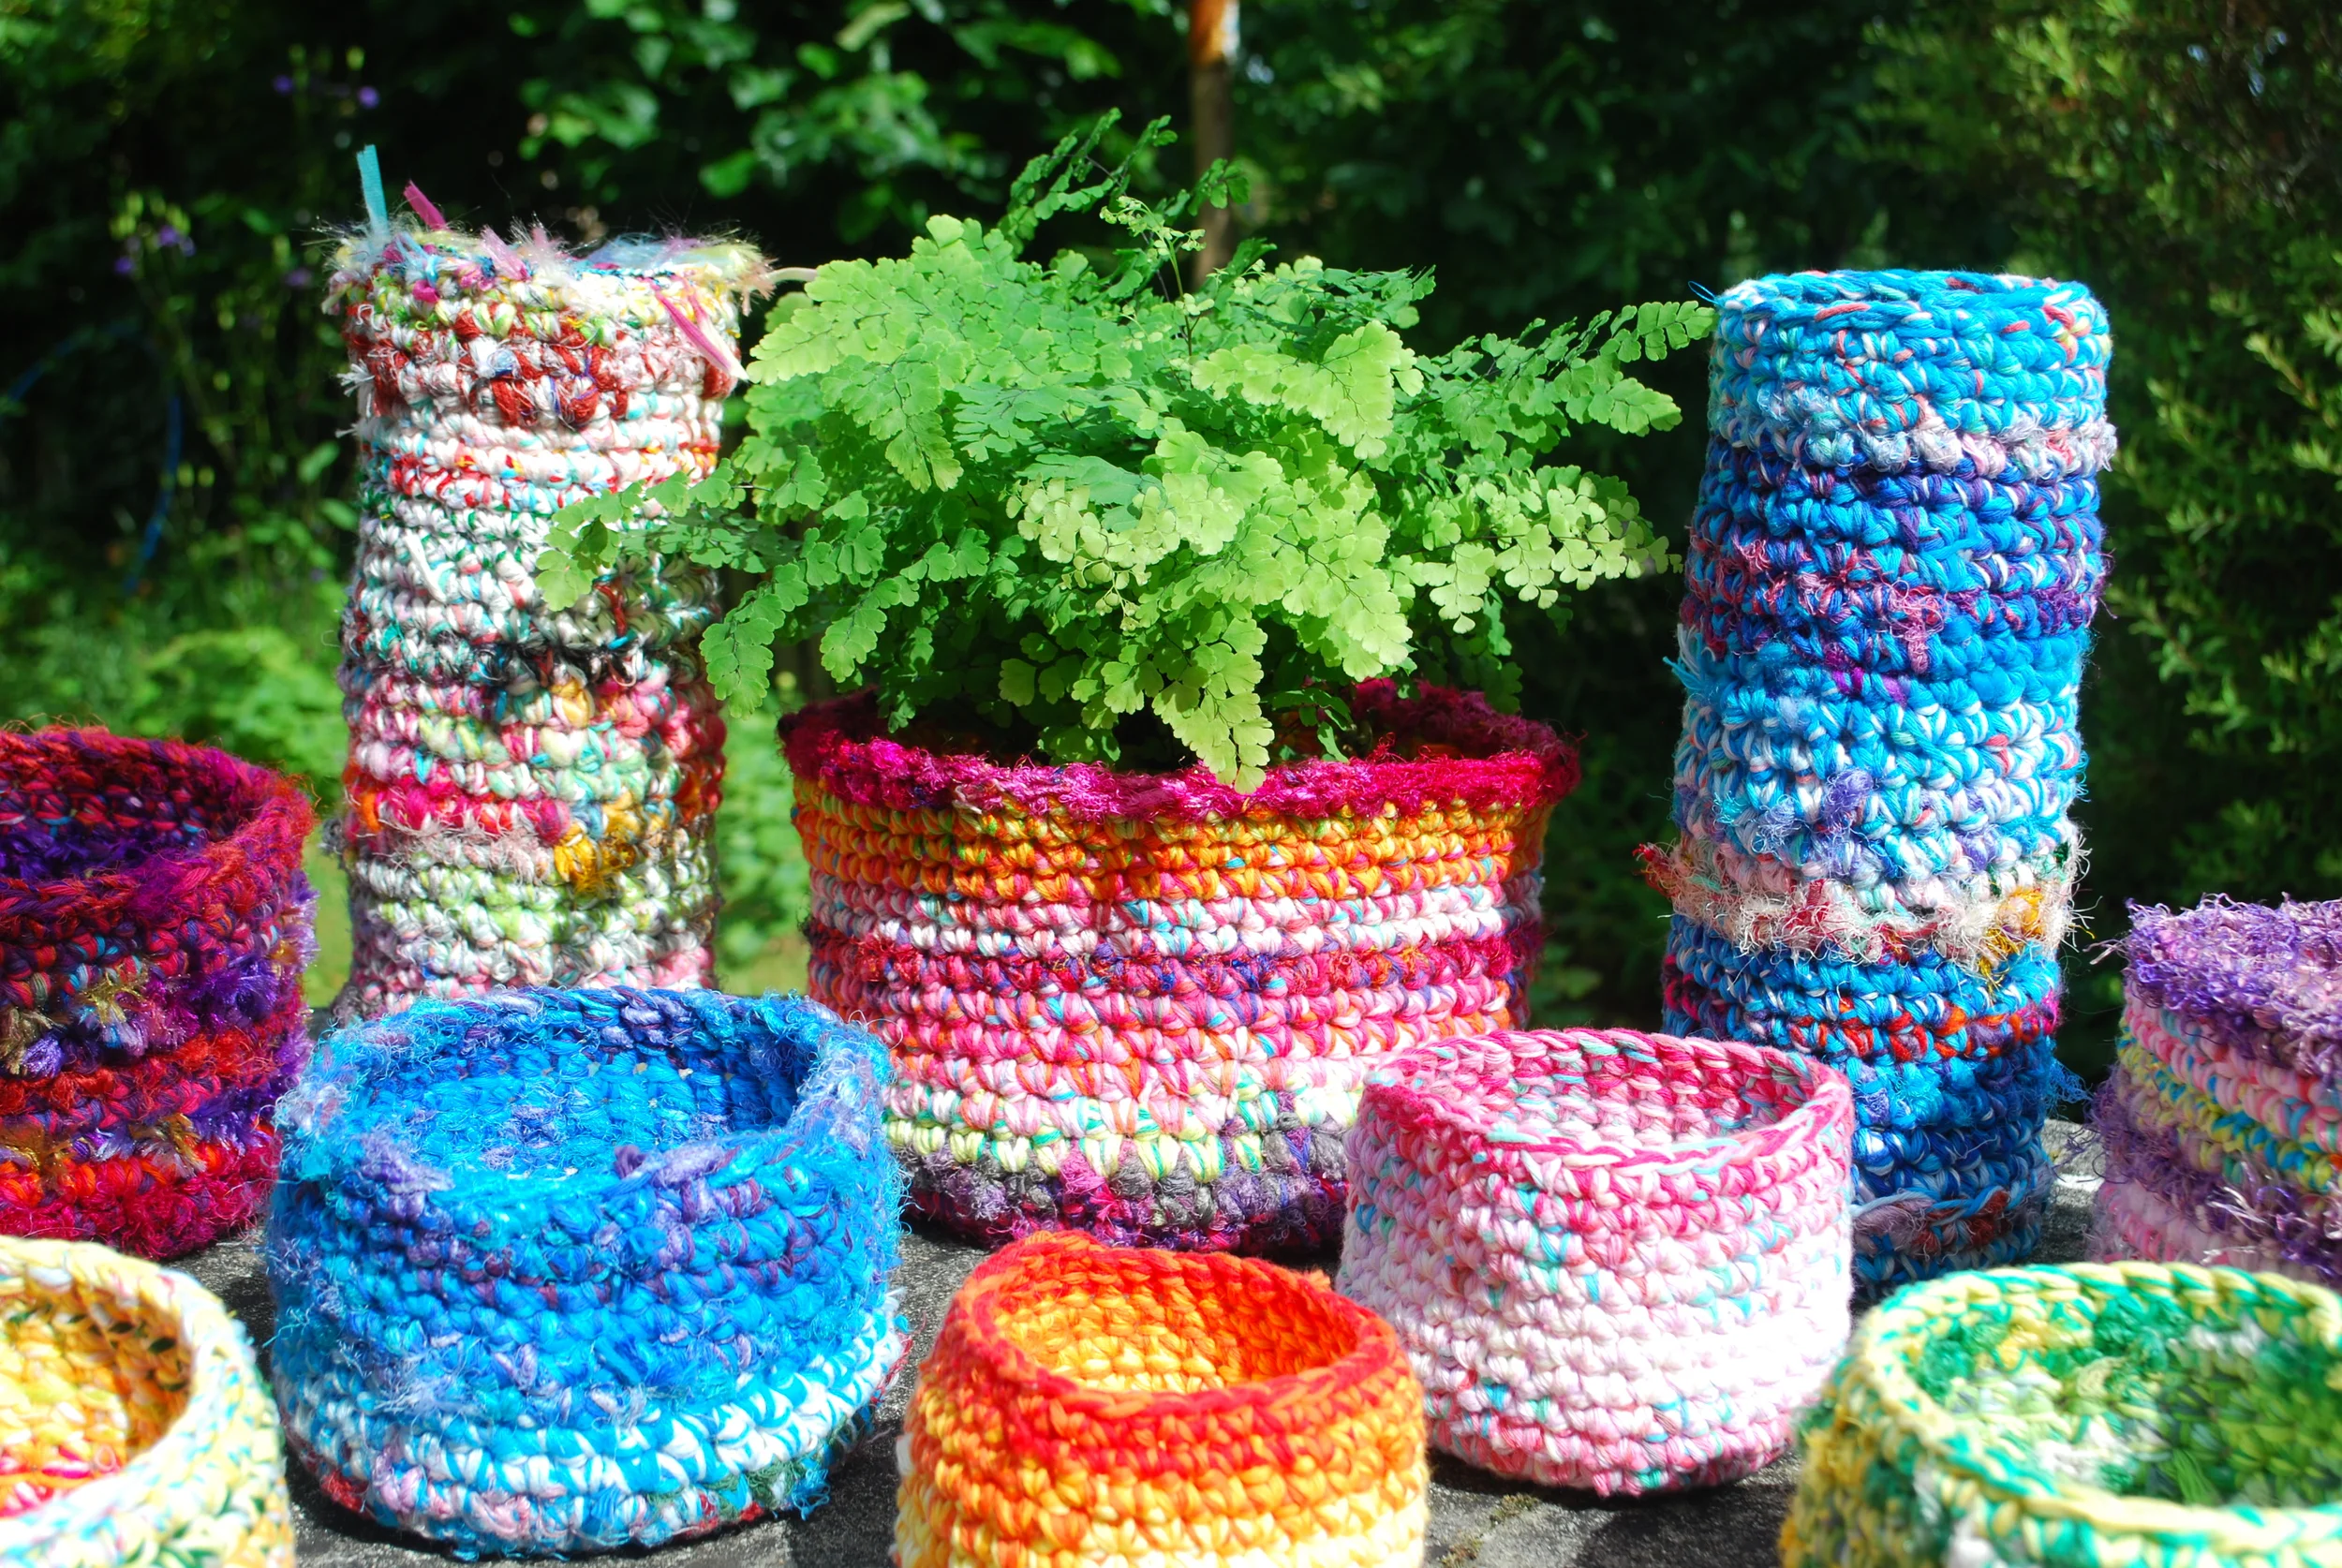
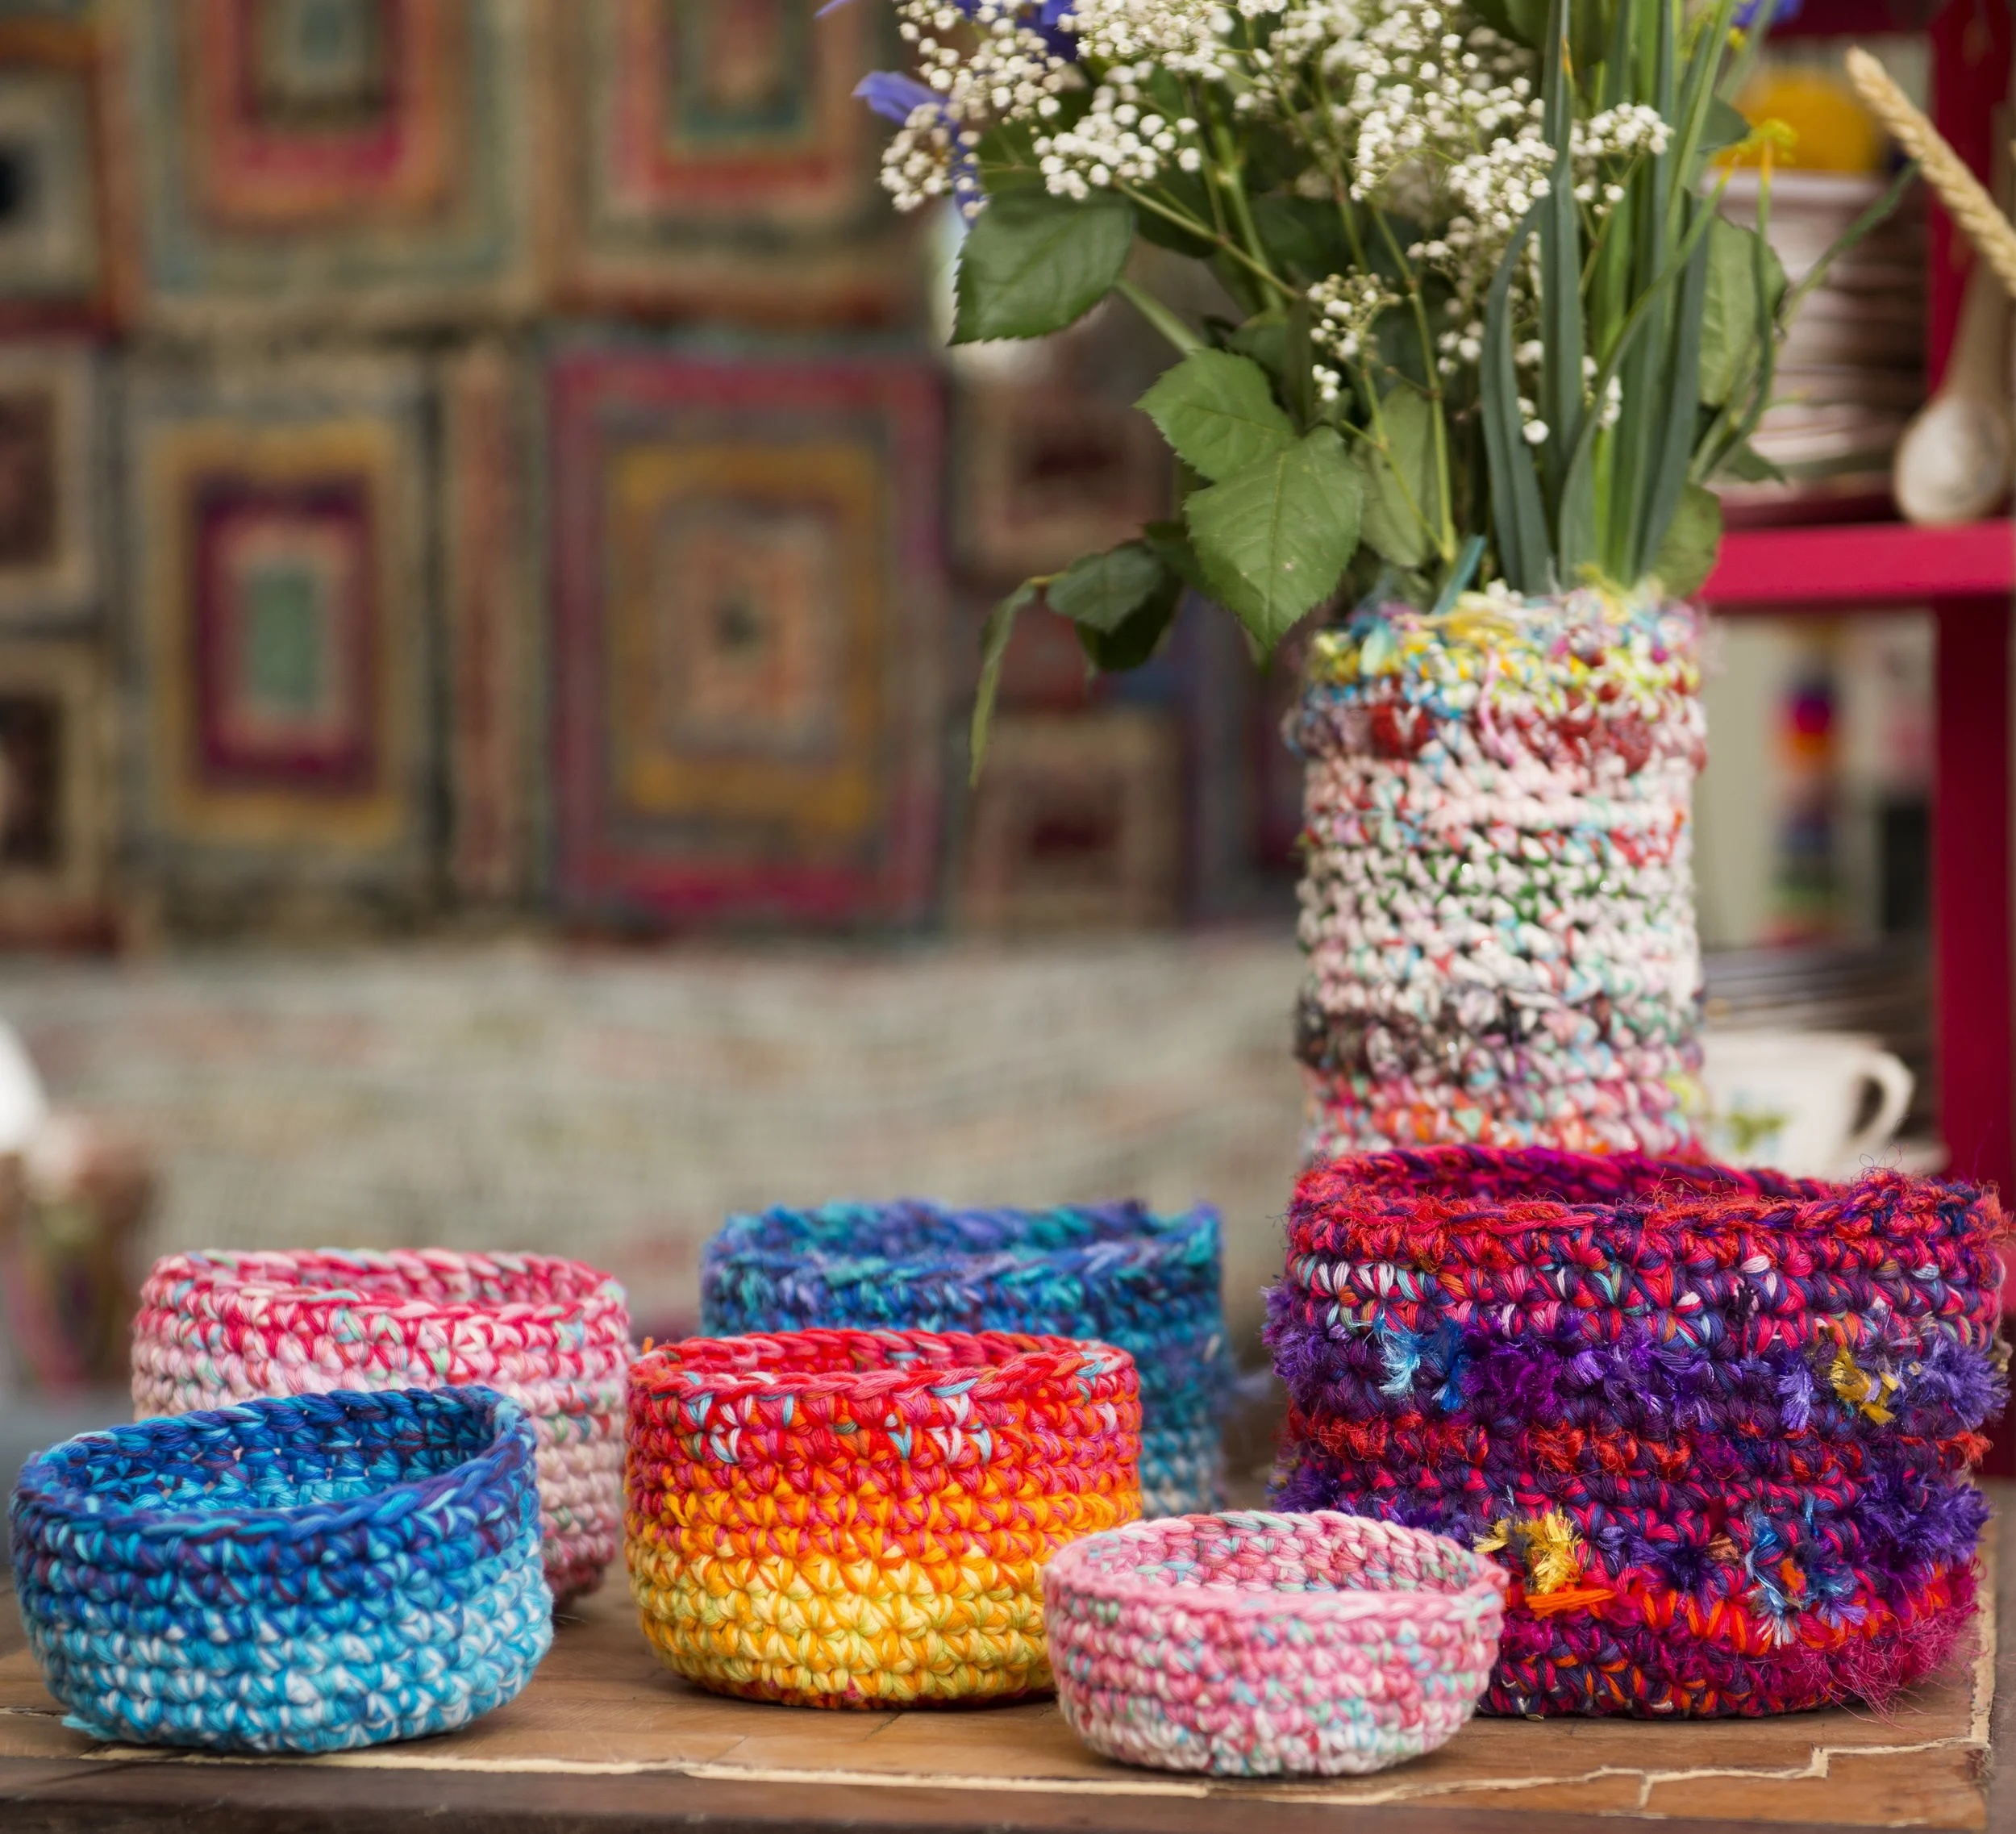
I am having a love affair with these baskets! They are so easy to make and the creative possibilities are endless once you start mixing different yarns. The trick when making them is to keep your tension as tight as possible. Working with cotton yarns helps them keep their shape as it doesn't have the springiness of wool and for that extra bit of texture try adding some re-spun sari silk or novelty yarns.
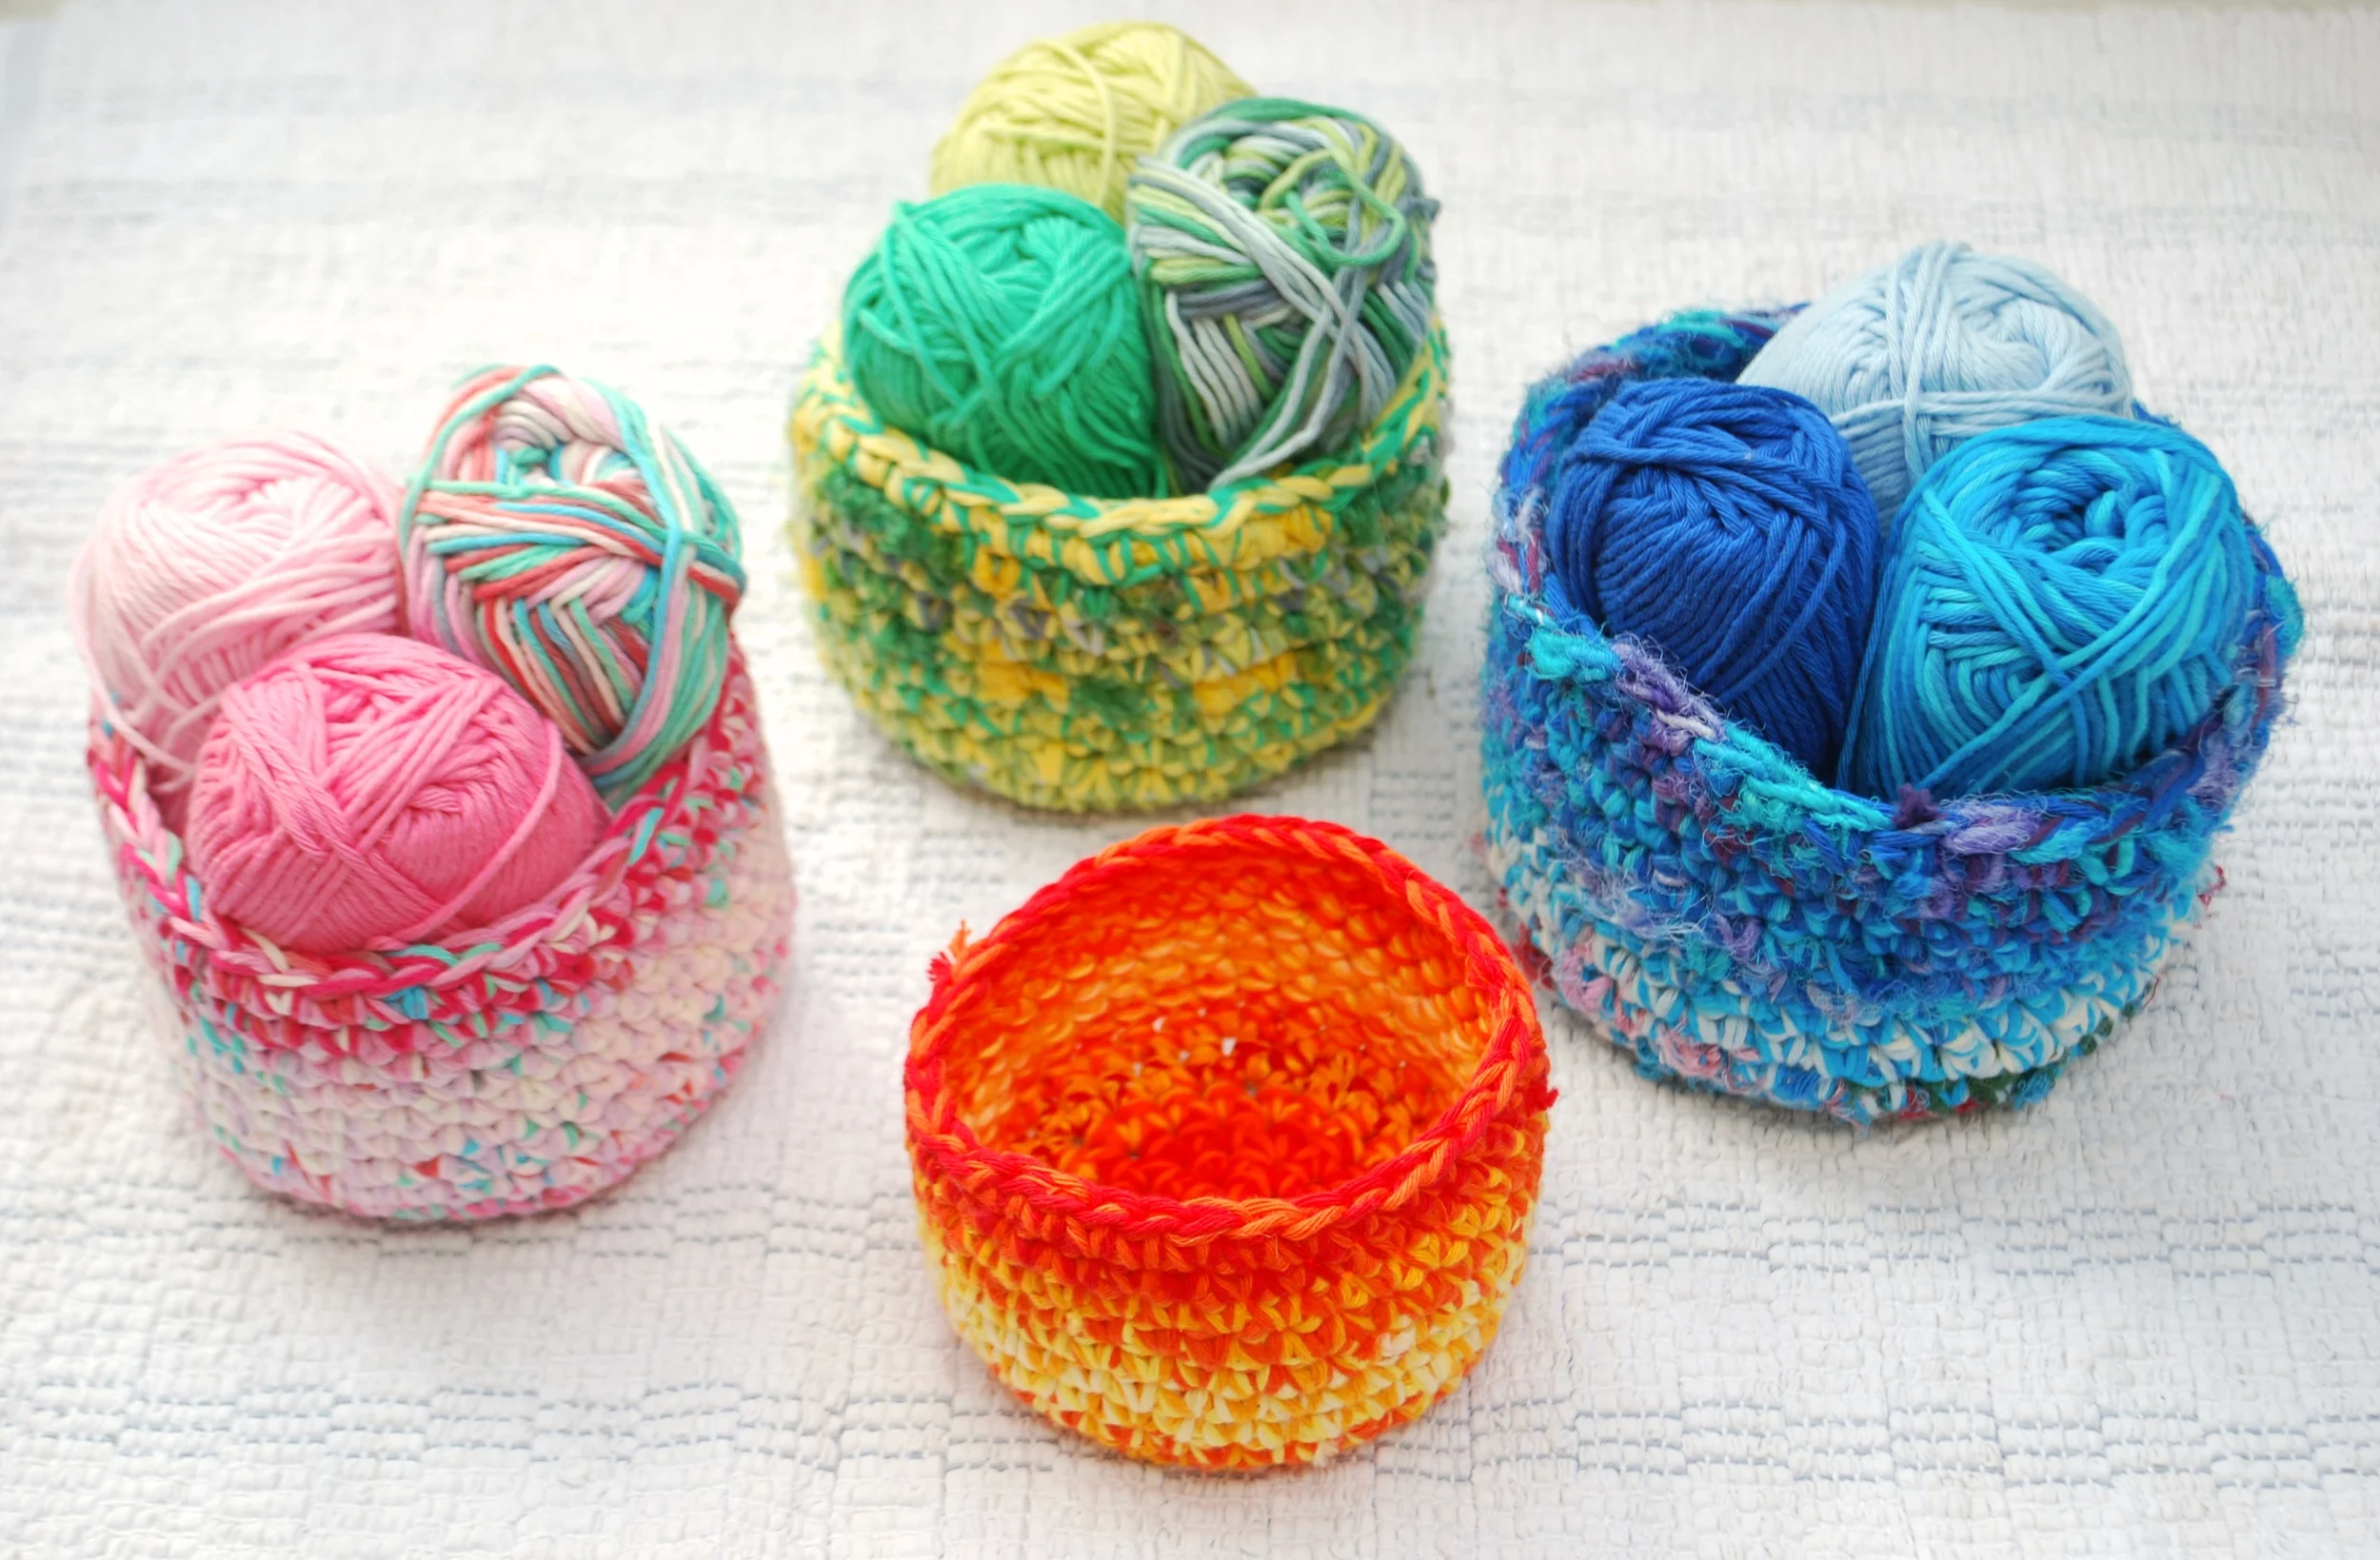
To begin you are going to need some cotton yarn. I'm using Rico Cotton DK as their colours are divine and the all their yarns are very reasonably priced so these baskets are an affordable addition to any crochet home!
Working with 2 strands at once to make one larger strand allows you to mix the colours and create beautiful blends. I recommend starting with 2 strands and once you have the hang of it (it's very easy) you can go up a few hook sizes and work with 3, 4 or even 5 strands. There aren't really any hard and fast rules as to hook size and yarn strands but I've written a rough guide to get you started.
I am using UK crochet terms of this universal pattern.
Ch = Chain
DC = Double Crochet
sl st = Slip Stitch
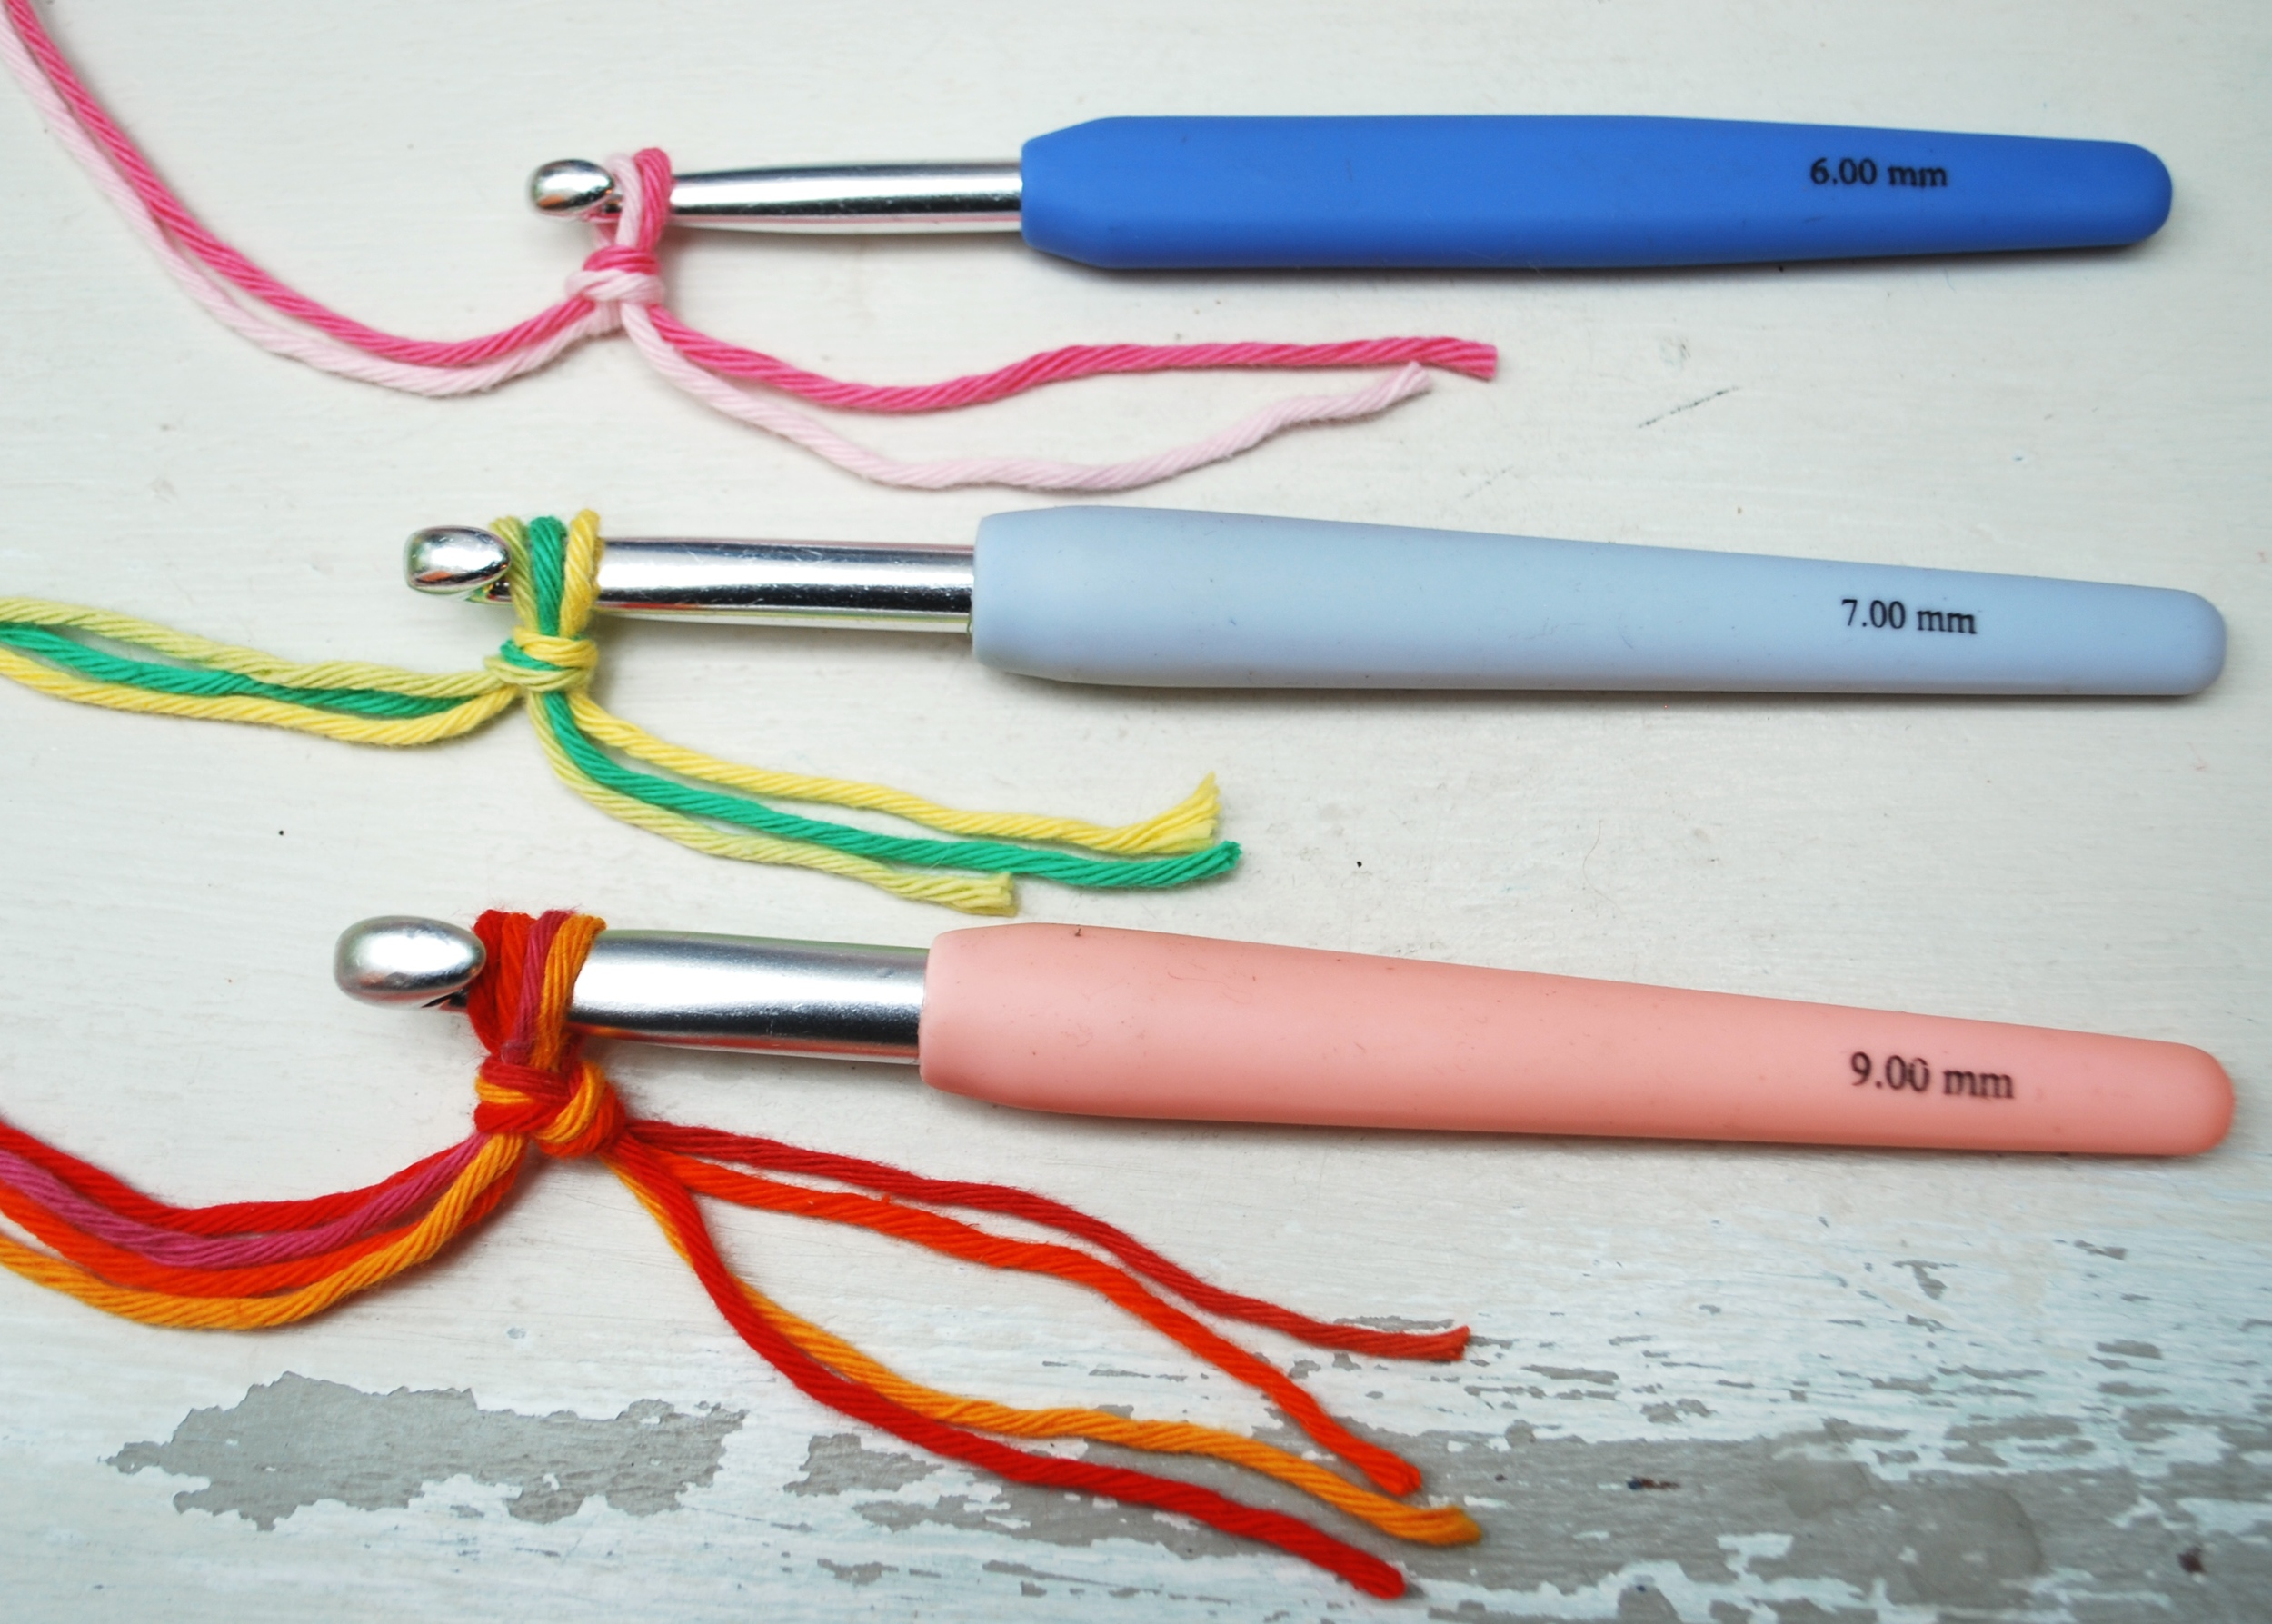
2 strands of yarn = 6mm hook
3 strands of yarn = 7mm hook
4 or 5 strands = 8 or 9mm hook
Keep your tension as tight as possible. If you think it's a bit loose try dropping down a hook size.
Every round will increase by 6 evenly spaced stitches until we have 6 rounds = 36 stitches
Do not count the Ch1 at the beginning of each round as a stitch.
To Begin:
Holding 2 strands of yarn to make one strand and with a 6mm hook (or smaller if need be) chain 6 and make a loop by joining with a sl st into 1st chain. (Just like we do at the beginning of the granny square)
Round 1:

Ch 1 (this does not count as a DC)
Work 6 DC into the loop and join with a Sl St into the 1st Ch 1 you made at the beginning.
Round 2:

Ch 1 and work 2 DC into each stitch from row below = 12 stitches.
Join into that first ch1 with a sl st.
Round 3:

Ch 1. *Work 2 DC into next stitch, 1 dc into next stitch* repeat 5 more times = 18 stitches and then join into first ch1 with a sl st.
Round 4:
Ch1. *Work 2 DC into next stitch, 1 DC into next stitch, 1 DC into next stitch* = 24 stitches and then join into first ch1 with a sl st.
Round 5:
Ch1. *Work 2DC into next stitch, 1 DC into next stitch, 1DC into next stitch, 1 DC into next stitch* repeat 5 more times = 30 stitches and then join into first ch1 with a sl st
Round 6:

Ch1. *Work 2DC into next stitch, 1 DC into next stitch, 1DC into next stitch, 1 DC into next stitch, 1 Dc into next stitch* repeat 5 more times = 36 stitches and then join into first ch1 with a sl st
Notice how it is beginning to look like a hexagon. This is because every increase (2DC into same stitch) happens n the same place as the row below.
Now for the fun bit. No more counting!
Ch 1 and work 1 DC into each stitch = 36 DC and join with a sl st into 1st stitch of round.
To start next round Ch1 and then 1DC into next 36 stitches. Repeat this process and watch as your basket begins to grow.
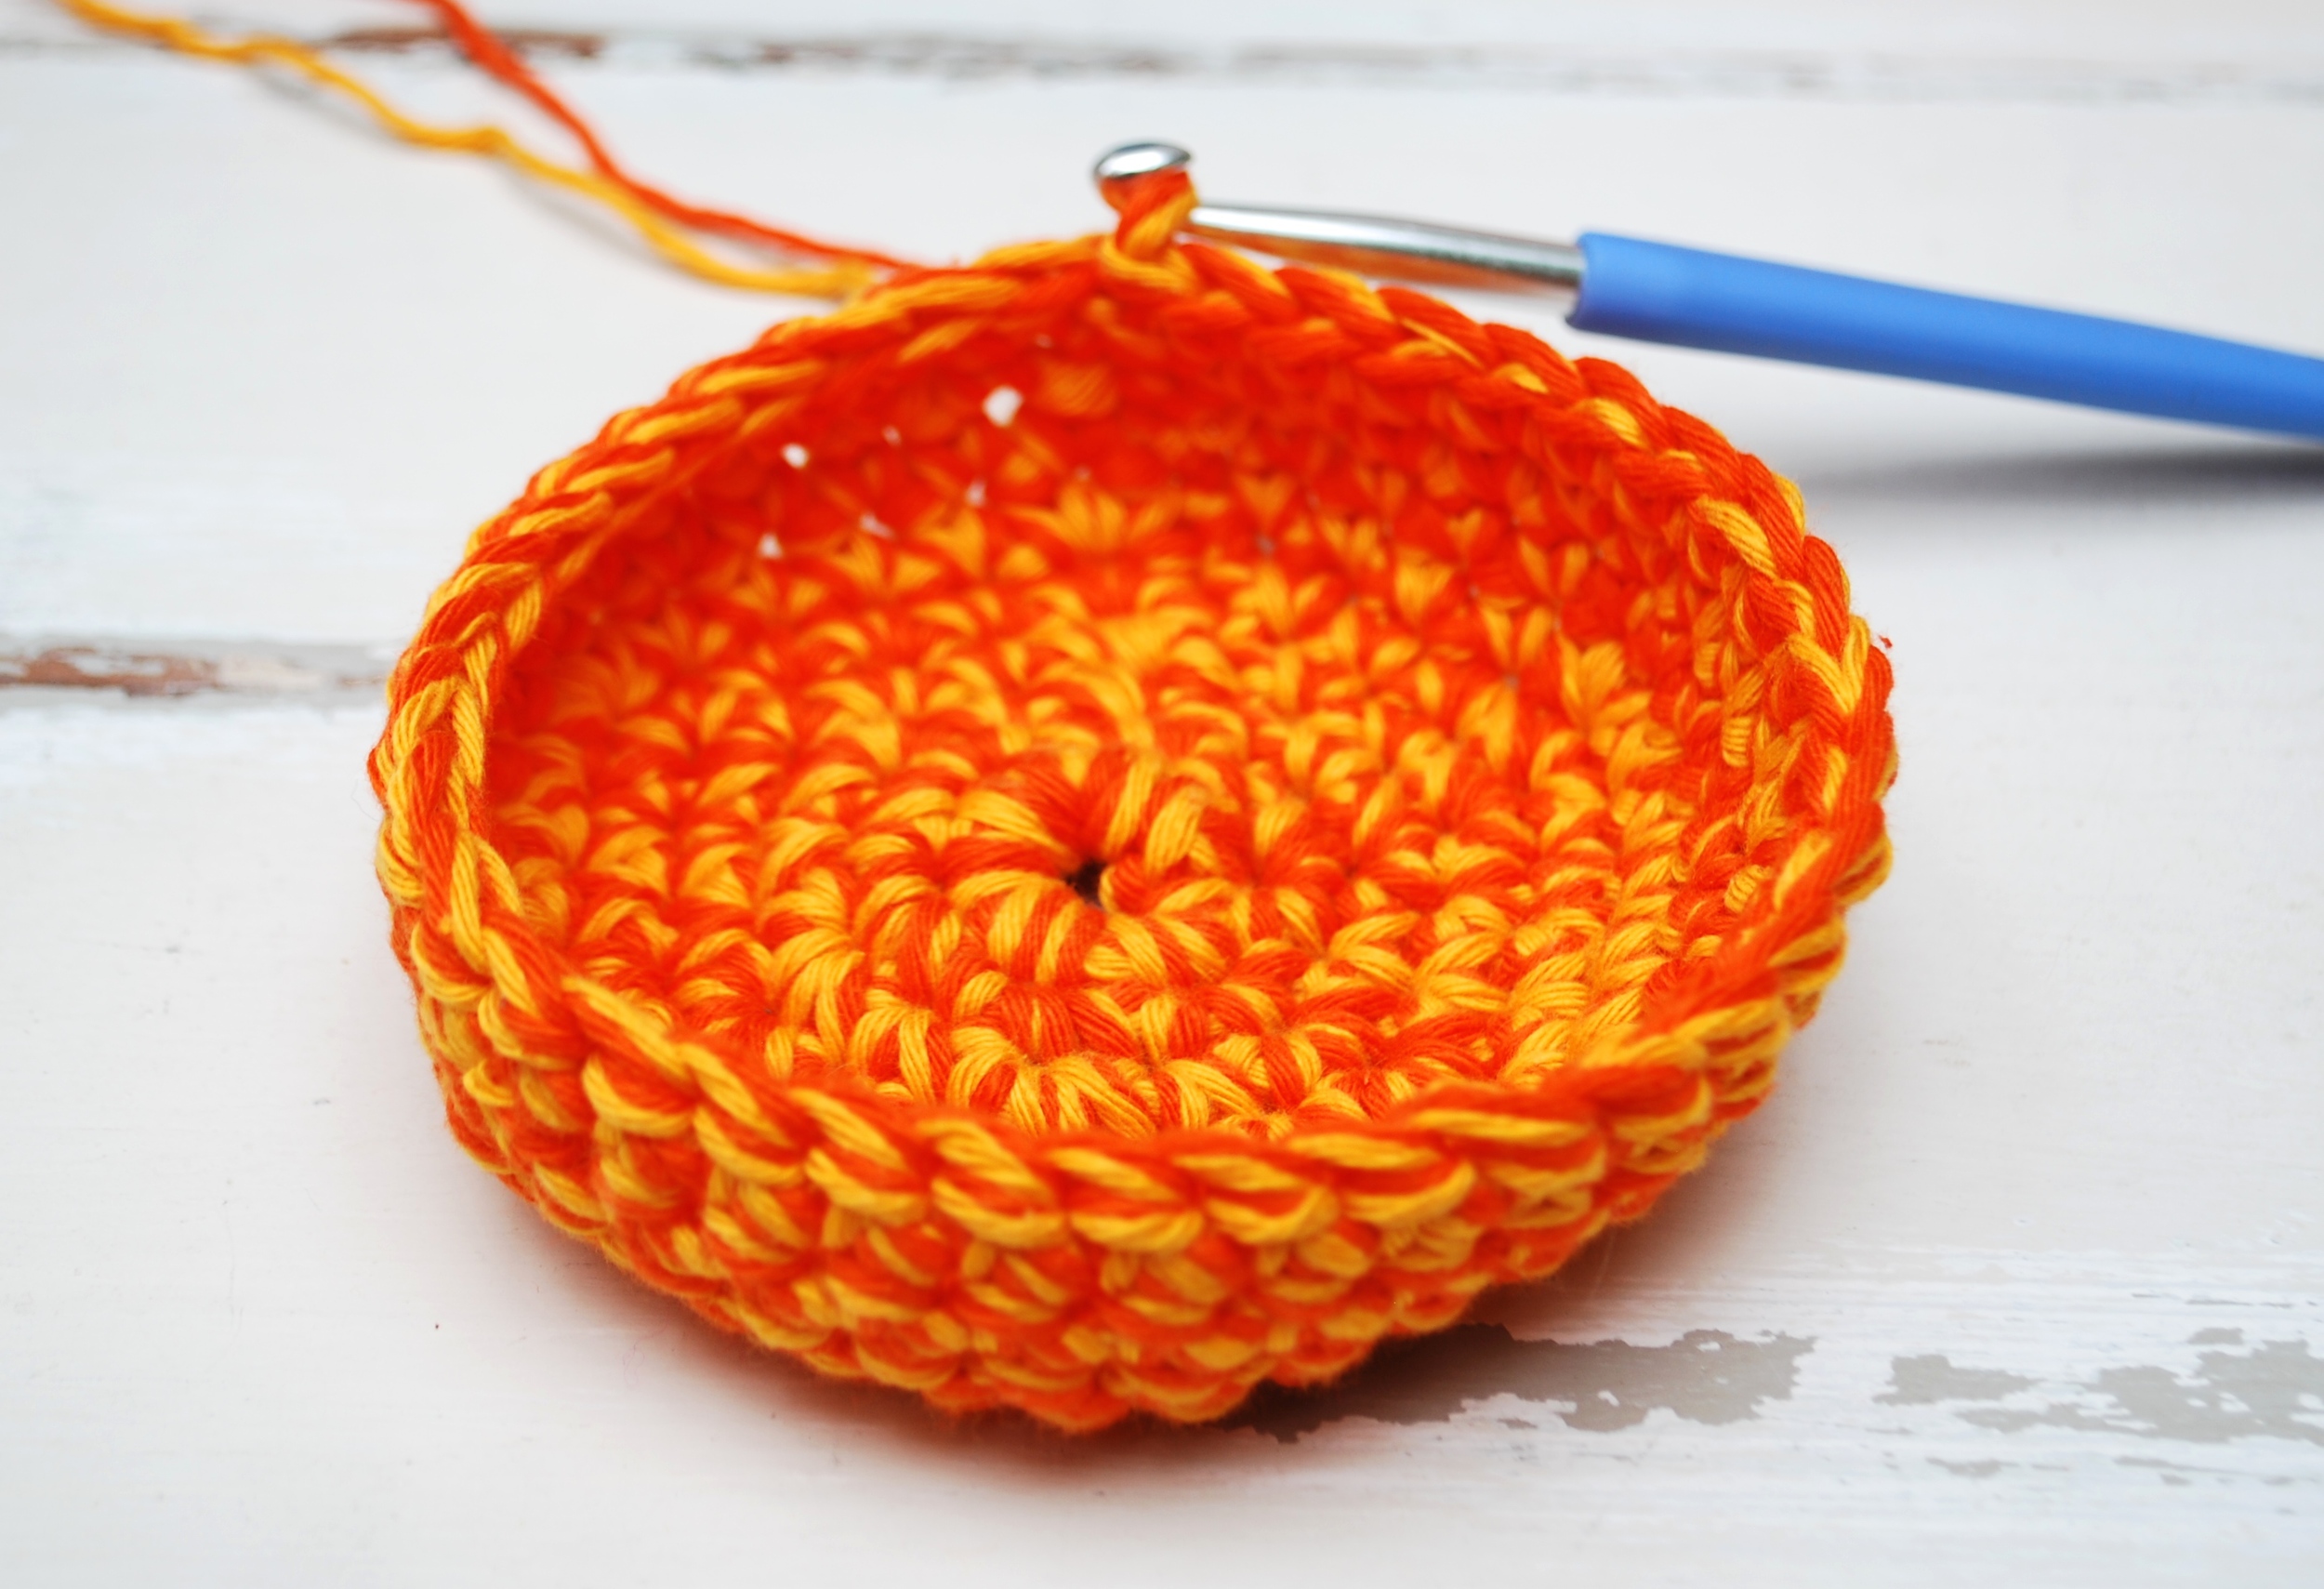
After several rounds the sides of your basket will begin to ‘curl up’. This is because you are no longer increasing with every round.

Turn your basket inside out (the right way round!) and continue.

Once you are confident with all of this try changing one of the yarns to a different colour. The easiest way to do this is to cut the yarn of one of the colours and join your new colour by tying the ends together with a firm knot.

Keep the 'tail' ends long and work them into the crochet as you go and you won't see the knot.
Continue crocheting around as before changing colours to your hearts content.
To finish:
Work to the end of a round and join with a sl st as before. Cut your yarn leaving a tail about 5 cm and ch1. Pull your yarn all the way through to secure as a knot. Sew in your tail end. Now all you need to do is decide how best to display your beautiful crochet basket!